DIY Candle Project
Hi, there, fellow Goodwill shoppers! It’s Sarah Ramberg of the upcycling blog, Sadie Seasongoods, again. Today, I’m sharing a fun craft project that starts at one of our Goodwill stores but ends up pretty enough to give as a gift!
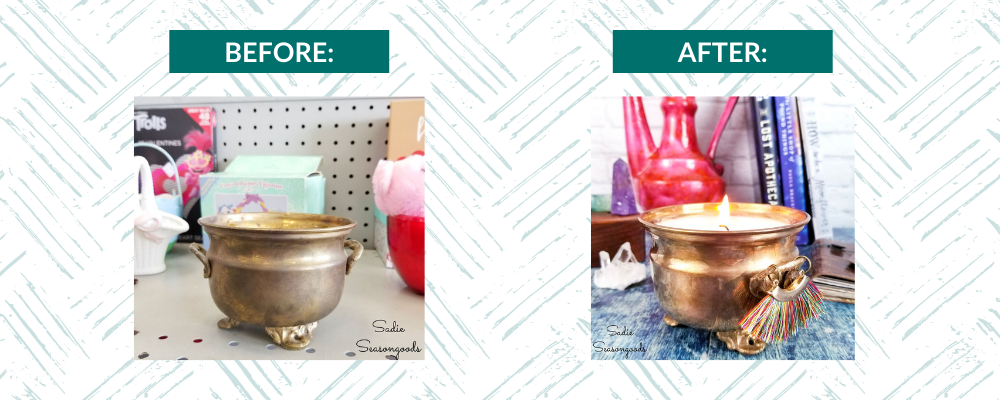
Candles never seem to go out of style, do they? But they’re easier than ever to make, thanks to craft stores that are filled with supplies! But to make this project extra special and unique, the candle holders start on the shelves at one of our Goodwill stores.
Craft Supply List
- Metal container from Goodwill (small to medium size is the easiest to work with)
- Candle-making supplies including soy wax flakes, wicks and candle fragrance oil (if you want a scented candle)
- Wax-melting cup and/or double boiler (pot for water and metal or glass bowl for melting wax)
- Hot glue gun
- Scissors
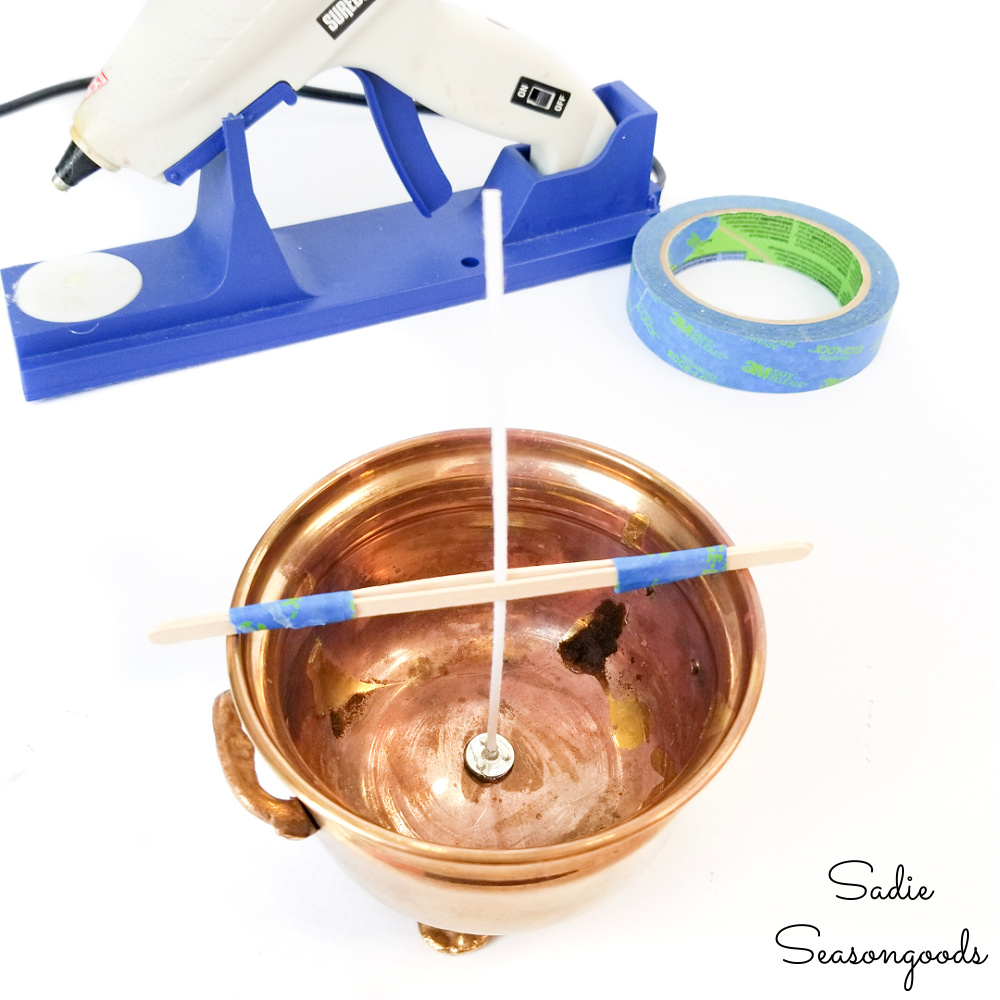
- Coffee stirrers, bamboo skewers or chopsticks
- Tape
- Ketchup (if cleaning/polishing a brass container)
- Paint stirrer or wooden spoon from Goodwill
- Charms and jewelry-making tools (small pliers, jump rings, etc.) – Optional, if decorating the exterior of your candle holder
Instructions
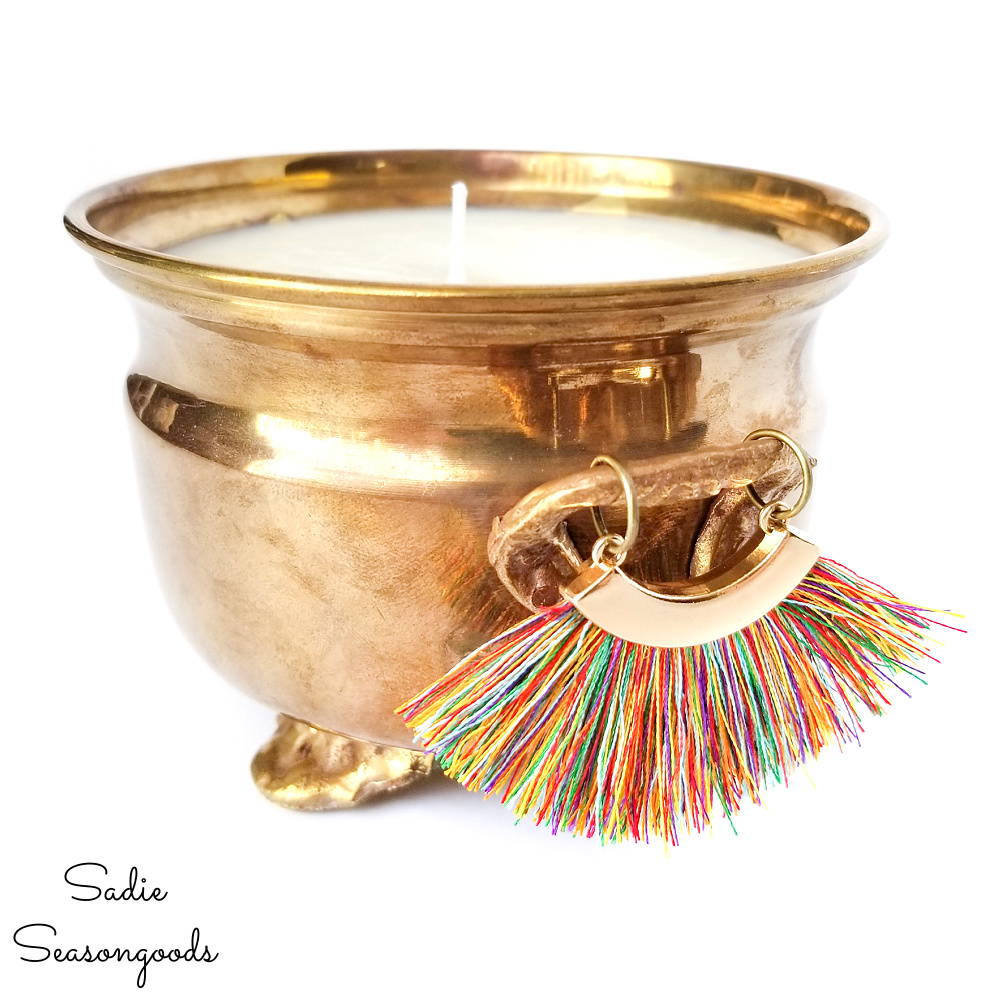
1. Select your future candle holder at Goodwill. I really wanted a brass container, and the Mooresville store had a big selection! But most glass and heavier ceramic containers will also work.

2. Once you have your container selected, gather the remainder of your craft supplies from the list above.

3. Since I was using brass, I needed to clean it properly before repurposing it as a candle. And believe it or not, ketchup is an AMAZING brass cleaner. After removing the price tag, I simply rubbed ketchup all over the container with my hands. Yes, I’m serious- it sounds weird but it really works!
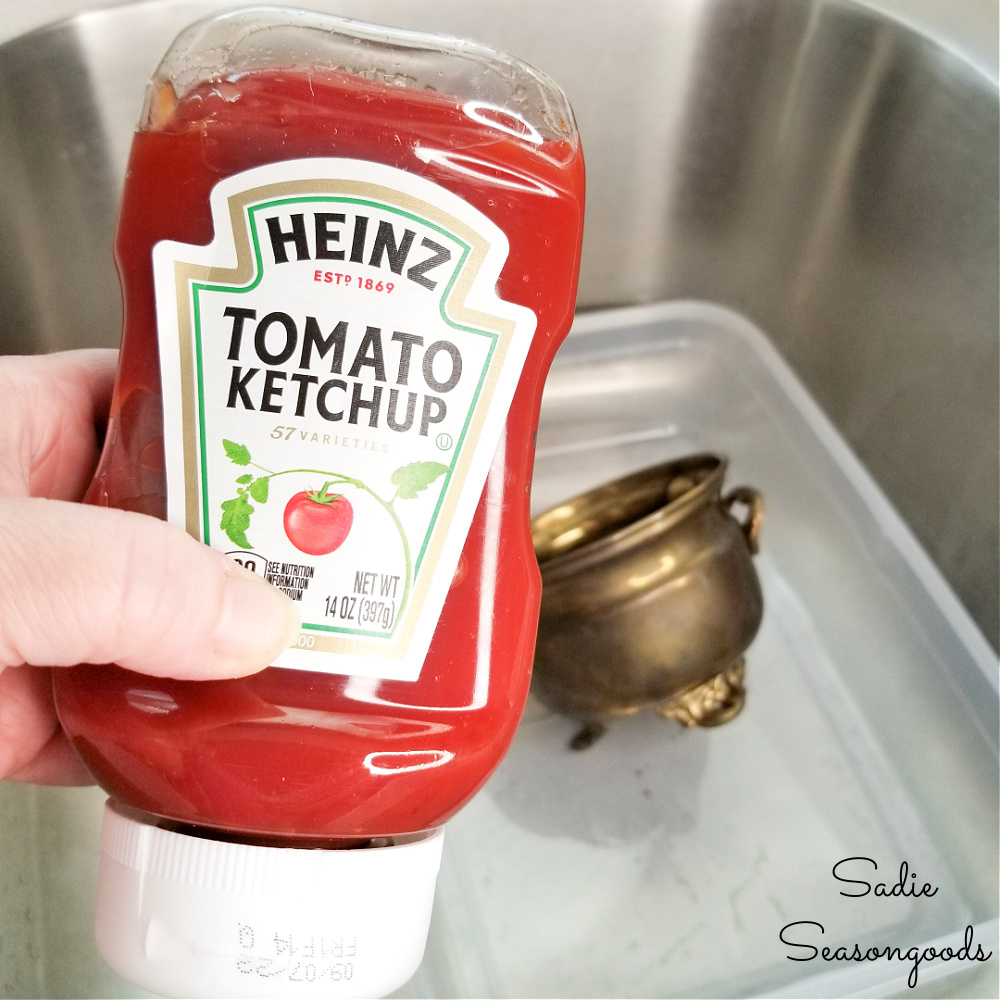
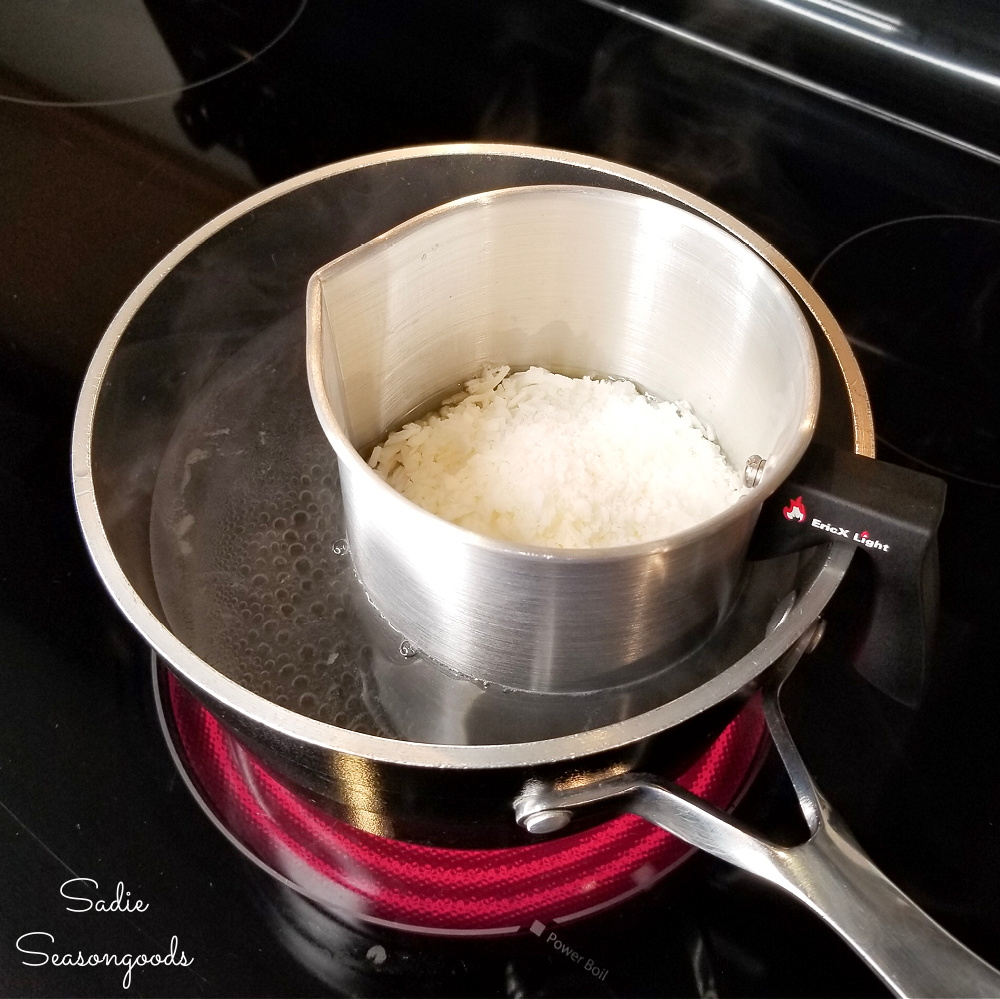
4. Rinse the ketchup off and dry your container completely. Does it shine beautifully now? Told ya so. Now, before doing anything else, fill your candleholder with wax chips. Leave at least 1/2” of space at the top. Dump the chips in the bowl or melting cup. Now, fill your container another time- just about 1/3 to 1/2 of the way and dump those chips in the melting cup and set aside. The extra wax accounts for the air spaces between chips, etc.
5. Now you’ve measured your wax, it’s time to set the wick!
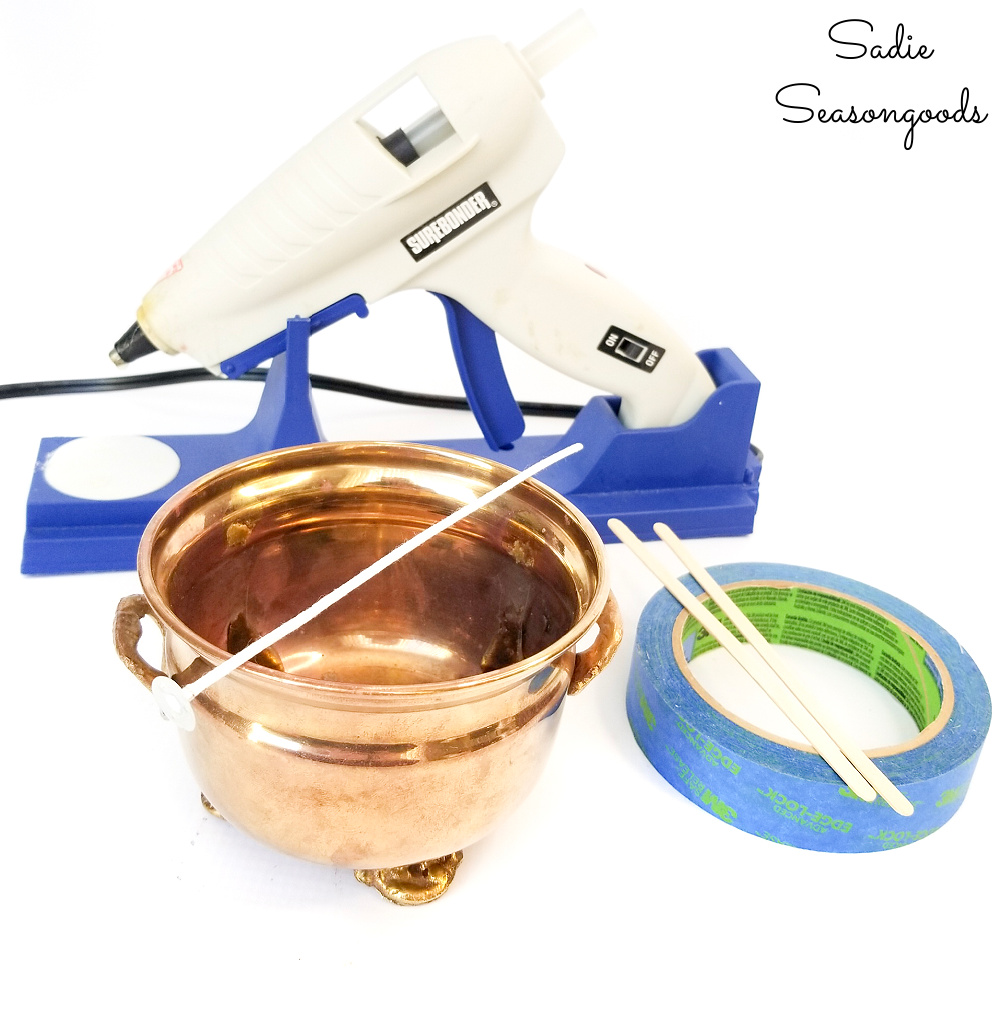
6. Heat up your hot glue gun and use a healthy dollop to secure your wick to the bottom of your candle holder. Then, use coffee stirrers (or something similar, so long as they’re longer than your candleholder is wide) to hold the wick upright.
7. Per the directions on your soy wax flakes, melt them in a double boiler on your stovetop. Use precaution when boiling water to not burn your fingers or hands in the process. Use a wooden paint stirrer or something similar (such as a wooden kitchen spoon from Goodwill) to stir the wax periodically as it melts. Once the wax is completely melted, you’re ready to pour your candle!

8. If you are using candle fragrance, follow the directions to add fragrance oil now before pouring the wax into your candle holder.
9. Carefully pour the molten wax into the candle holder, avoiding your wick support system. Again, leave at least ½” of space at the top.

10. Once poured, it’s best to just leave your candle alone (don’t move it) for several hours. This will allow the wax to harden with a nice even surface (i.e., no sloshed wax on the sides, etc.).

11. Once the wax has completely hardened and your candleholder is cool to the touch (i.e., the next day), trim the wick (1/2” above the wax surface) with scissors and add charms if you want! I found some necklace charms on clearance at a craft store, but why not check out the jewelry at Goodwill while you’re there?

12. With my jewelry-making pliers and some larger jump rings, I simply dangled the necklace pendants on the handles of my candle holder.
13. Now you can enjoy your fabulous new candle in your home or give it as a gift.
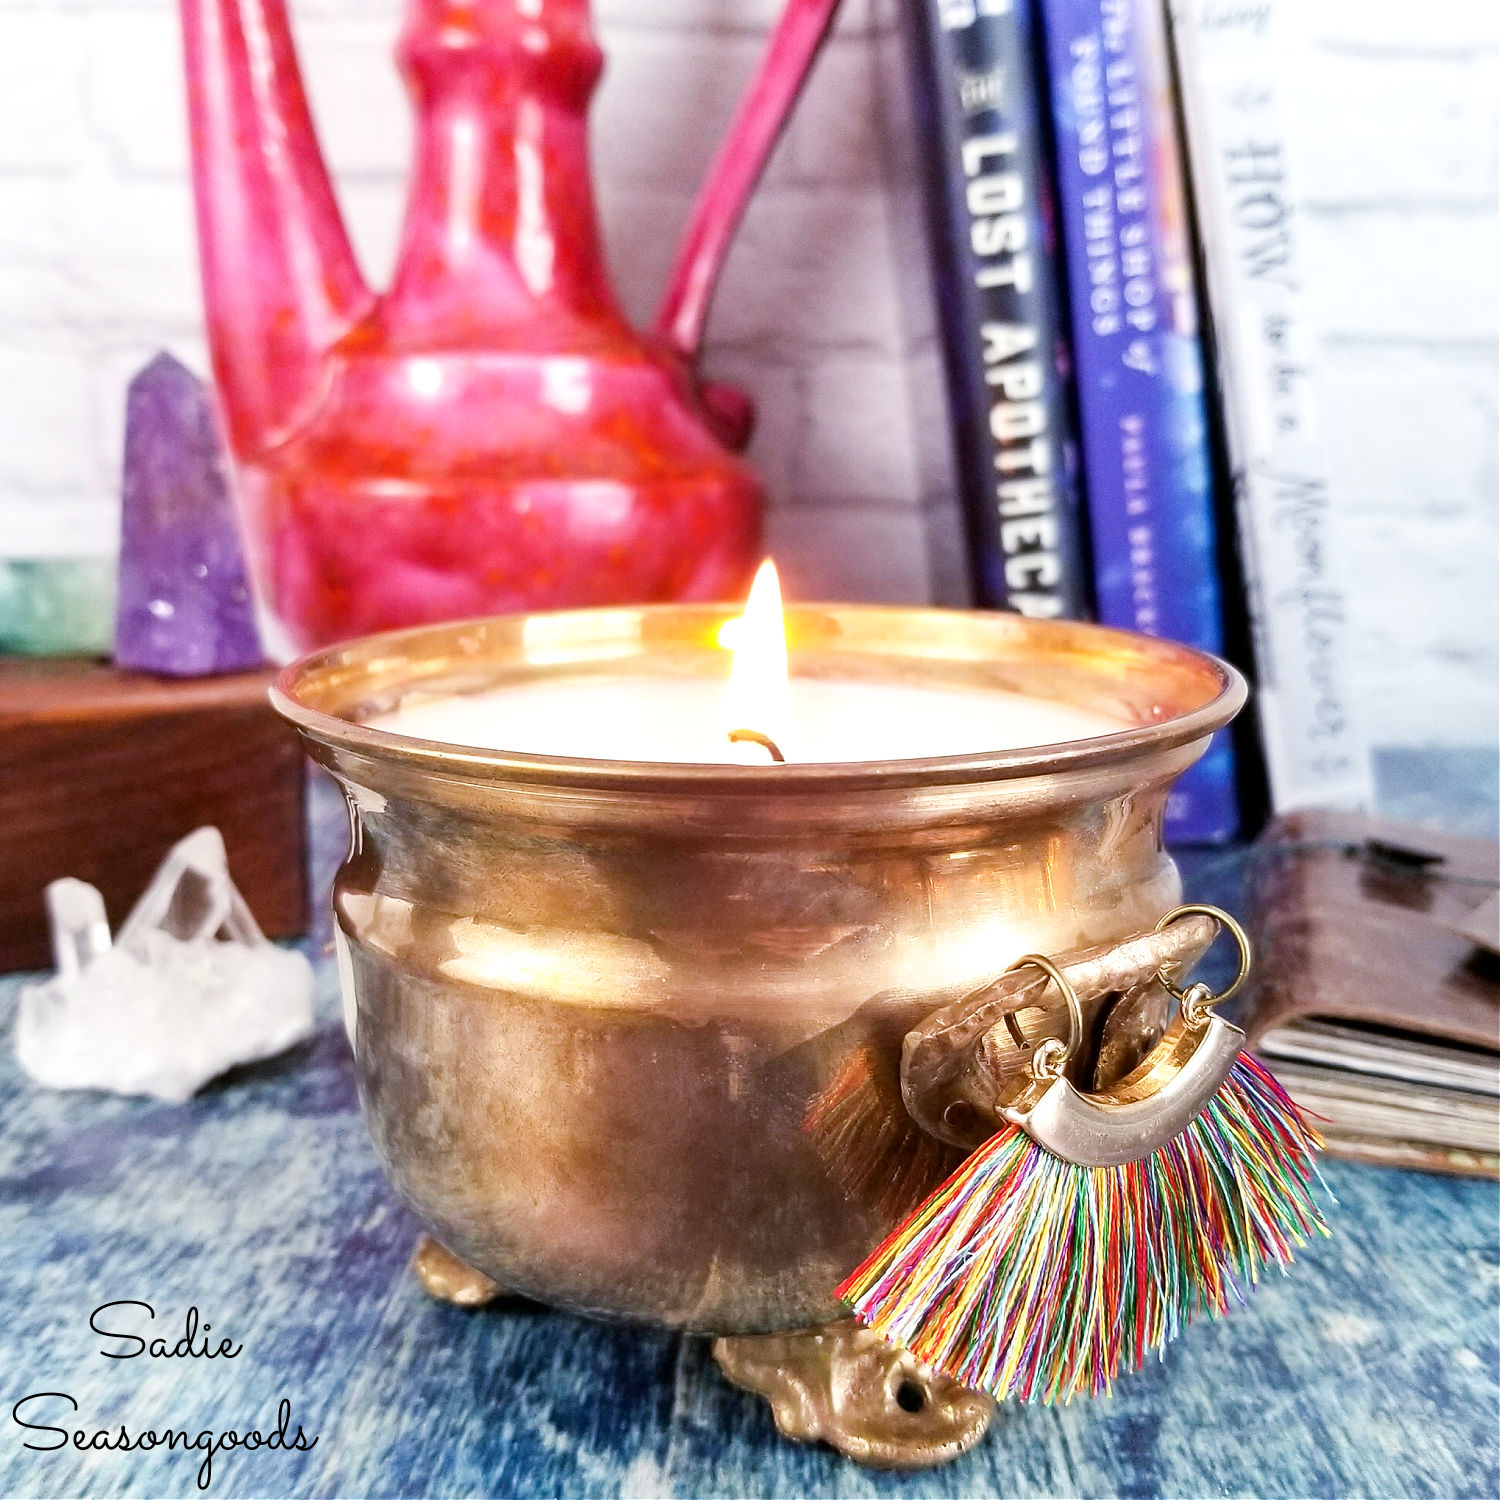
What a fun and easy way to create a DIY candle that is gorgeous enough to give as a gift. I mean, that time of year is right around the corner, isn’t it? And, of course, half the fun is hunting down unique candle holders at Goodwill, too.
Show Off Your Project
Thank you so much for checking out this trendy repurposing idea with me. I’d love to see what kind of interesting candleholders you find at Goodwill, too- please tag me on Instagram or Facebook to show them off!
-Sarah at Sadie Seasongoods