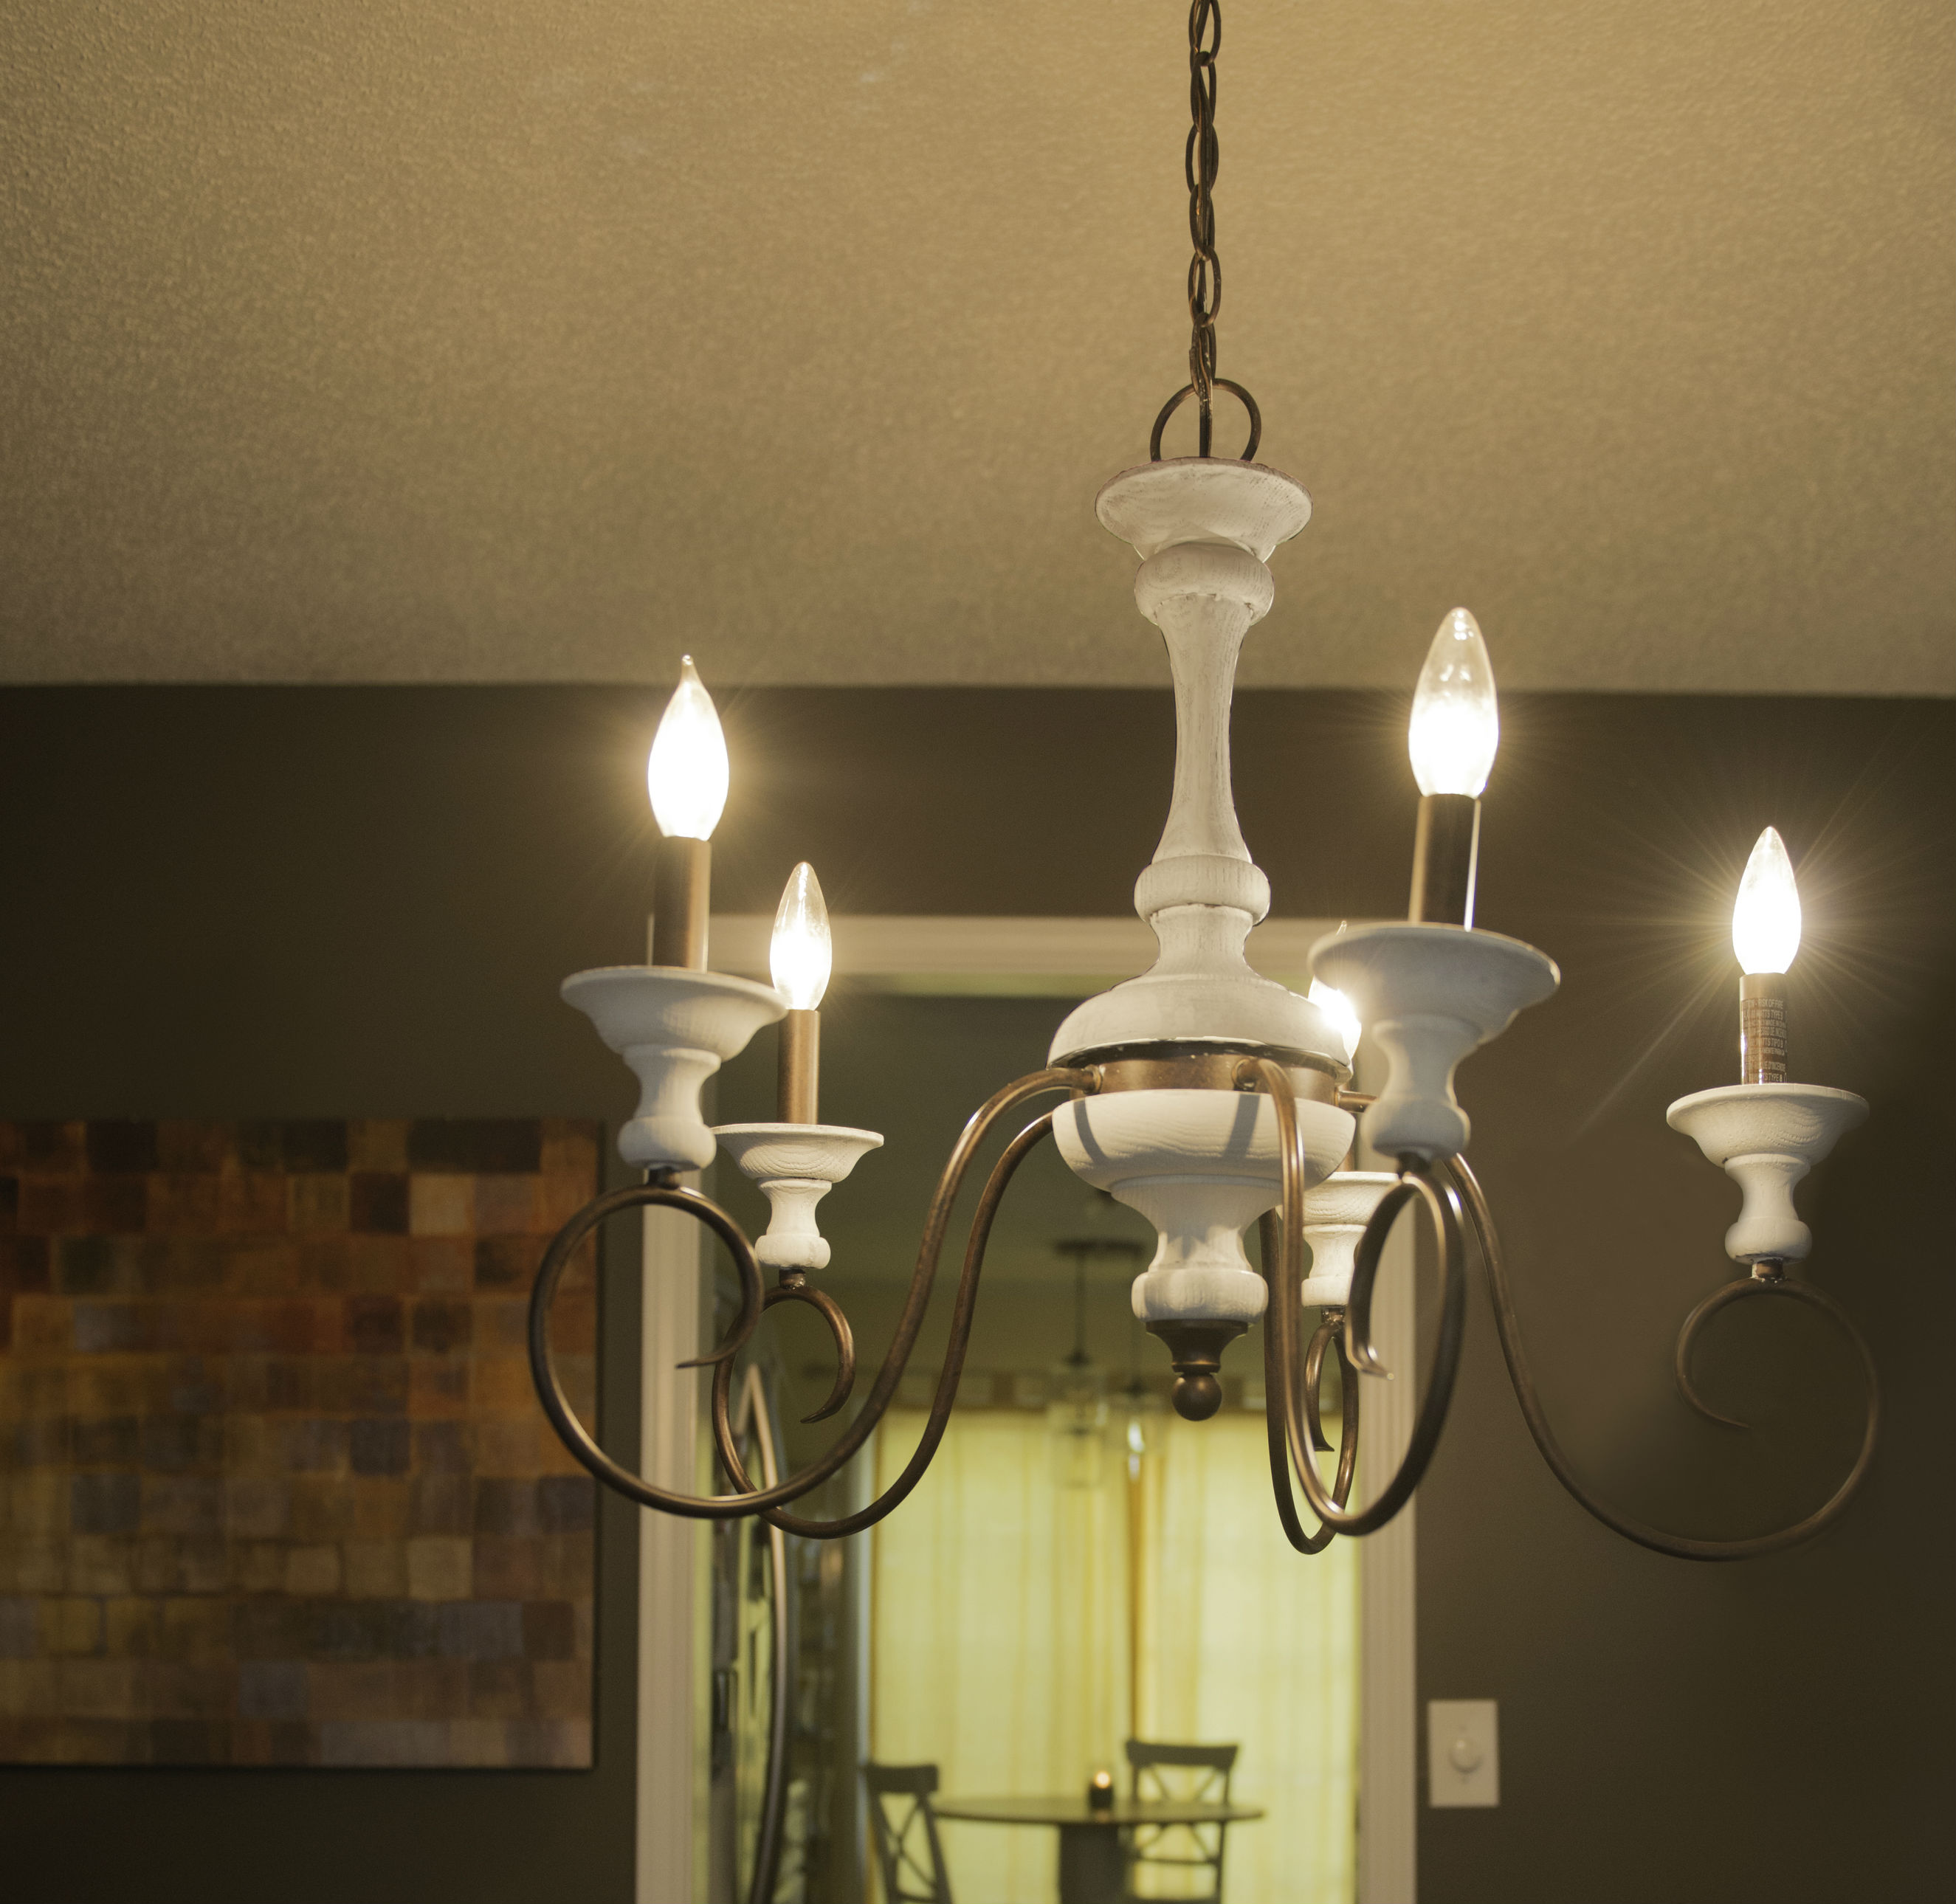
 There’s nothing more satisfying than stopping at Goodwill, finding an old piece of wooden furniture on the cheap, and putting a fresh spin on it. One very popular option is to whitewash wooden items to achieve the shabby chic look. Keep in mind, you don’t have to stick with traditional pieces like tables and dressers—you can also whitewash things like picture frames, small shelves, and even wooden light fixtures like chandeliers. For this project we’ve chosen to whitewash a wooden chandelier to give this modern design some vintage, old world charm. Materials:
- Drop cloth
- Chemical stripper (only for wooden items with finishes)
- White vinegar (only for stripped furniture)
- Wooden chandelier
- Medium or fine grit sand paper
- Soft wiping rags
- Whitewash pickling stain, not paint (we used MinWax)
- Paintbrush – small and soft
- Sponge
- Clear water-based sealant
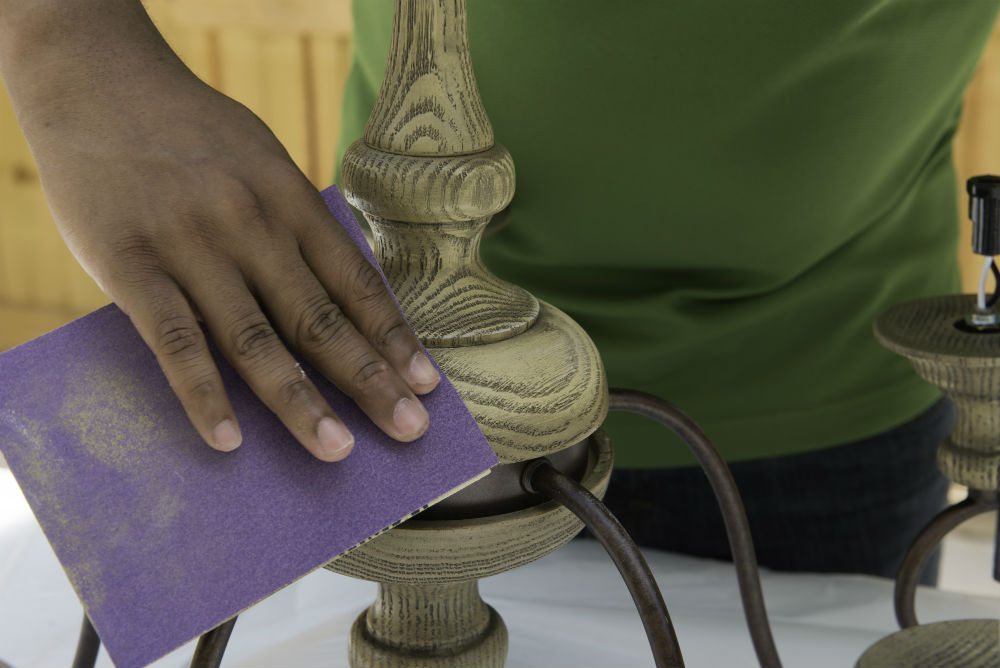
 Step 1 Gather all materials and prep your workspace. Lay down a drop cloth. Step 2 If the wood is sealed, be sure to strip first with a chemical stripper. Then wash with equal parts white vinegar and water. The vinegar removes stains and dirt that could prevent the whitewash from applying evenly. Allow to dry completely; then sand the piece gently with medium or fine grit sandpaper.
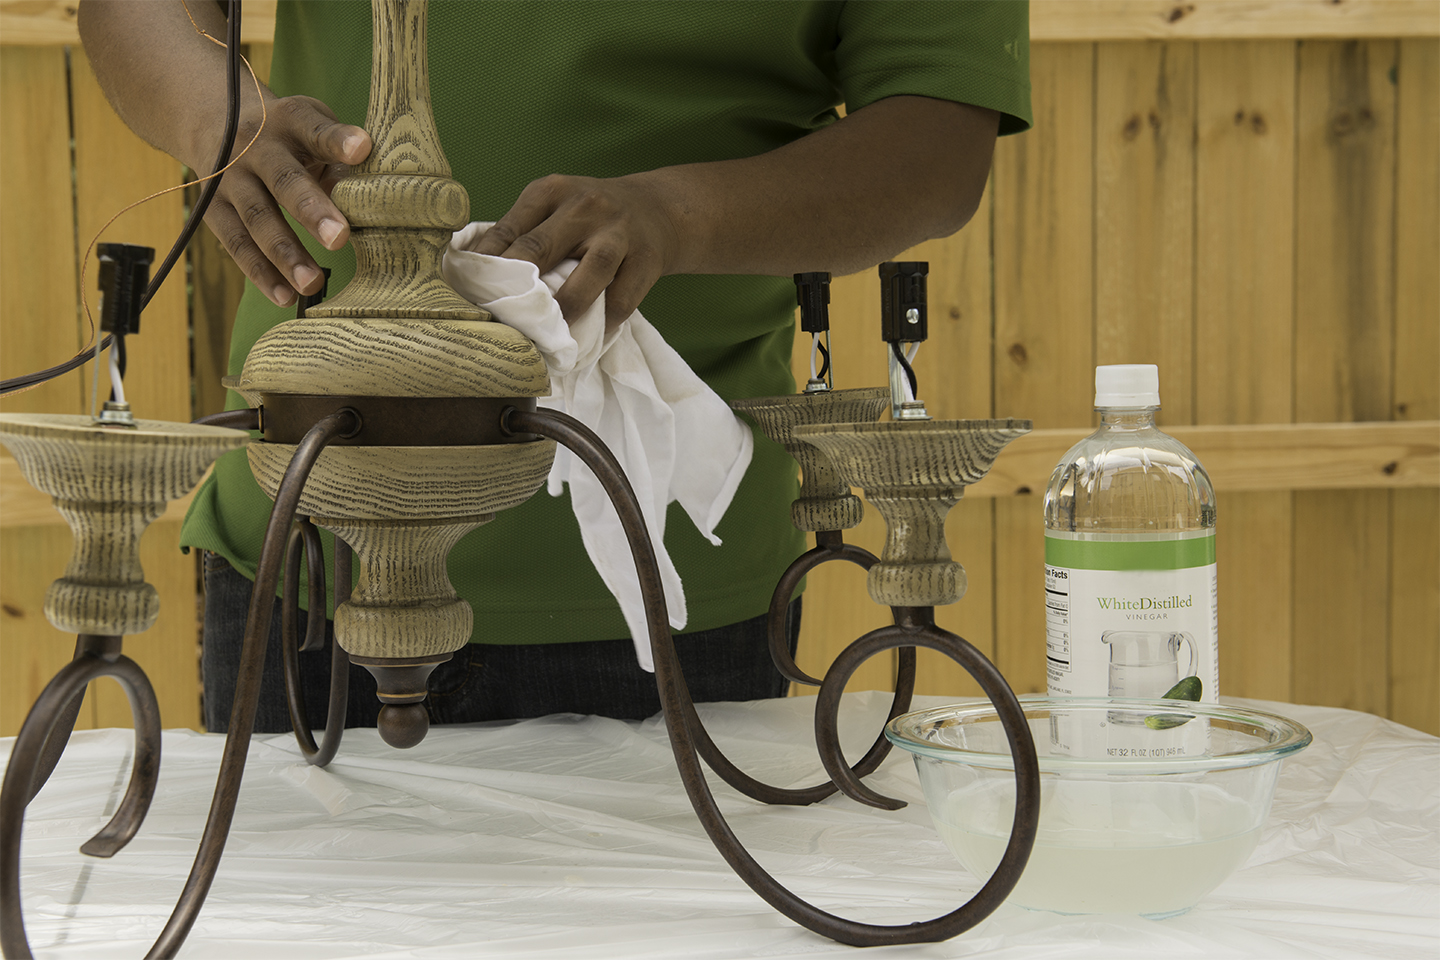
 Step 3 Wipe with a clean cloth to remove dust and create a clean surface.
 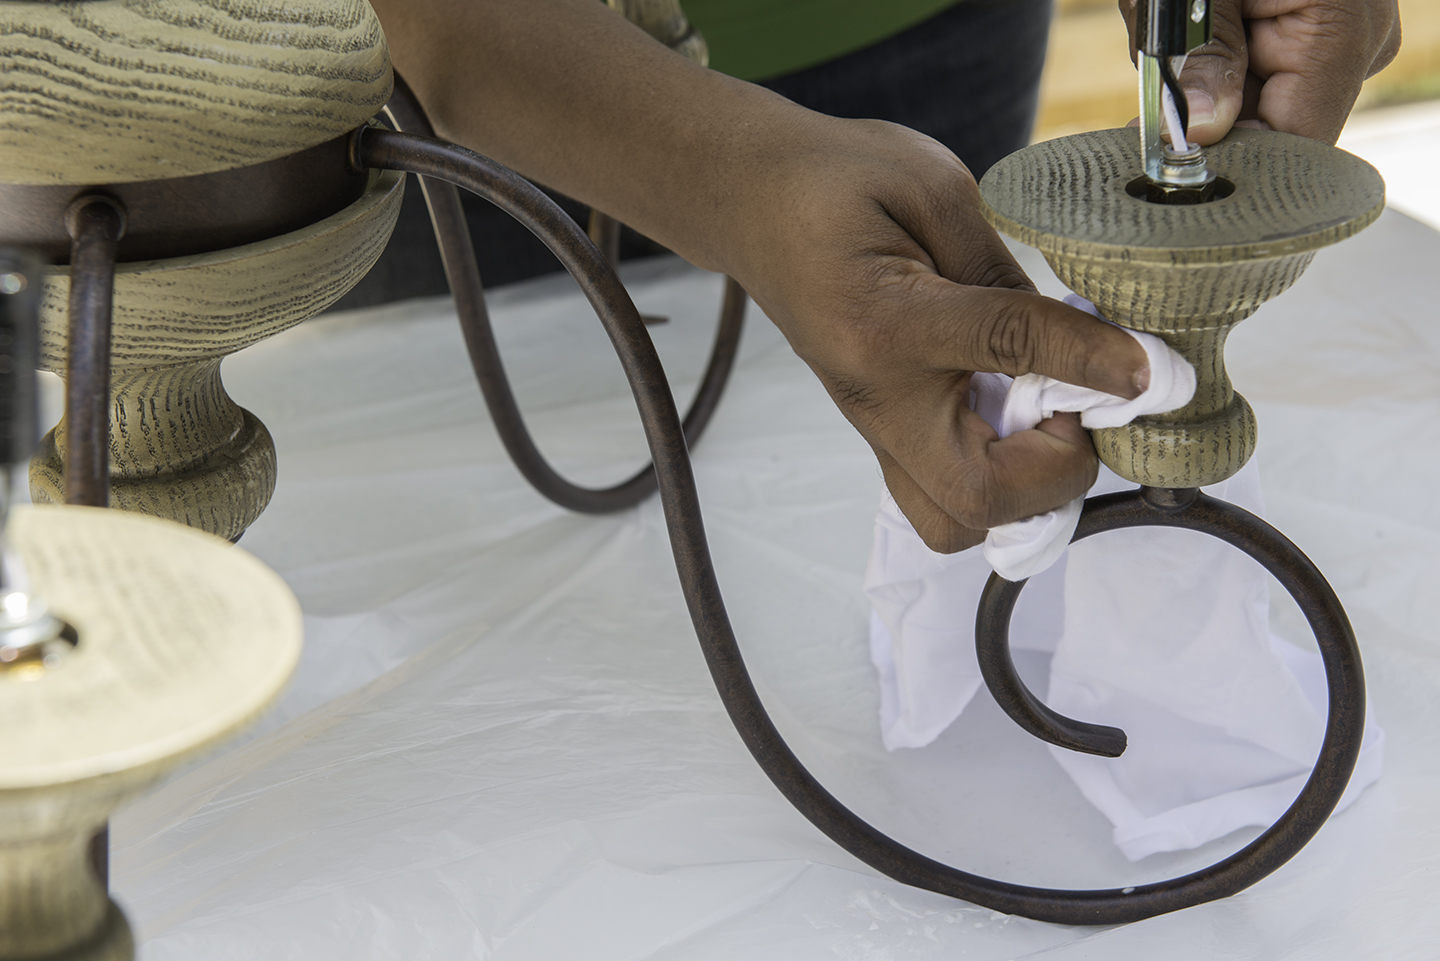 Step 4 Create the whitewash solution by mixing a 1:2 ratio of white latex paint and water in your bucket and stir thoroughly. By creating a thin wash, you can control the exact amount of whitewash you’re applying, and the more coats you apply, the more opaque the wash will become.
  Step 5 Apply the mixture directly to the wood surface in long, fluid strokes using a soft paintbrush or soft cloth. Use a sponge to whitewash hard-to-reach corners and crevices.
 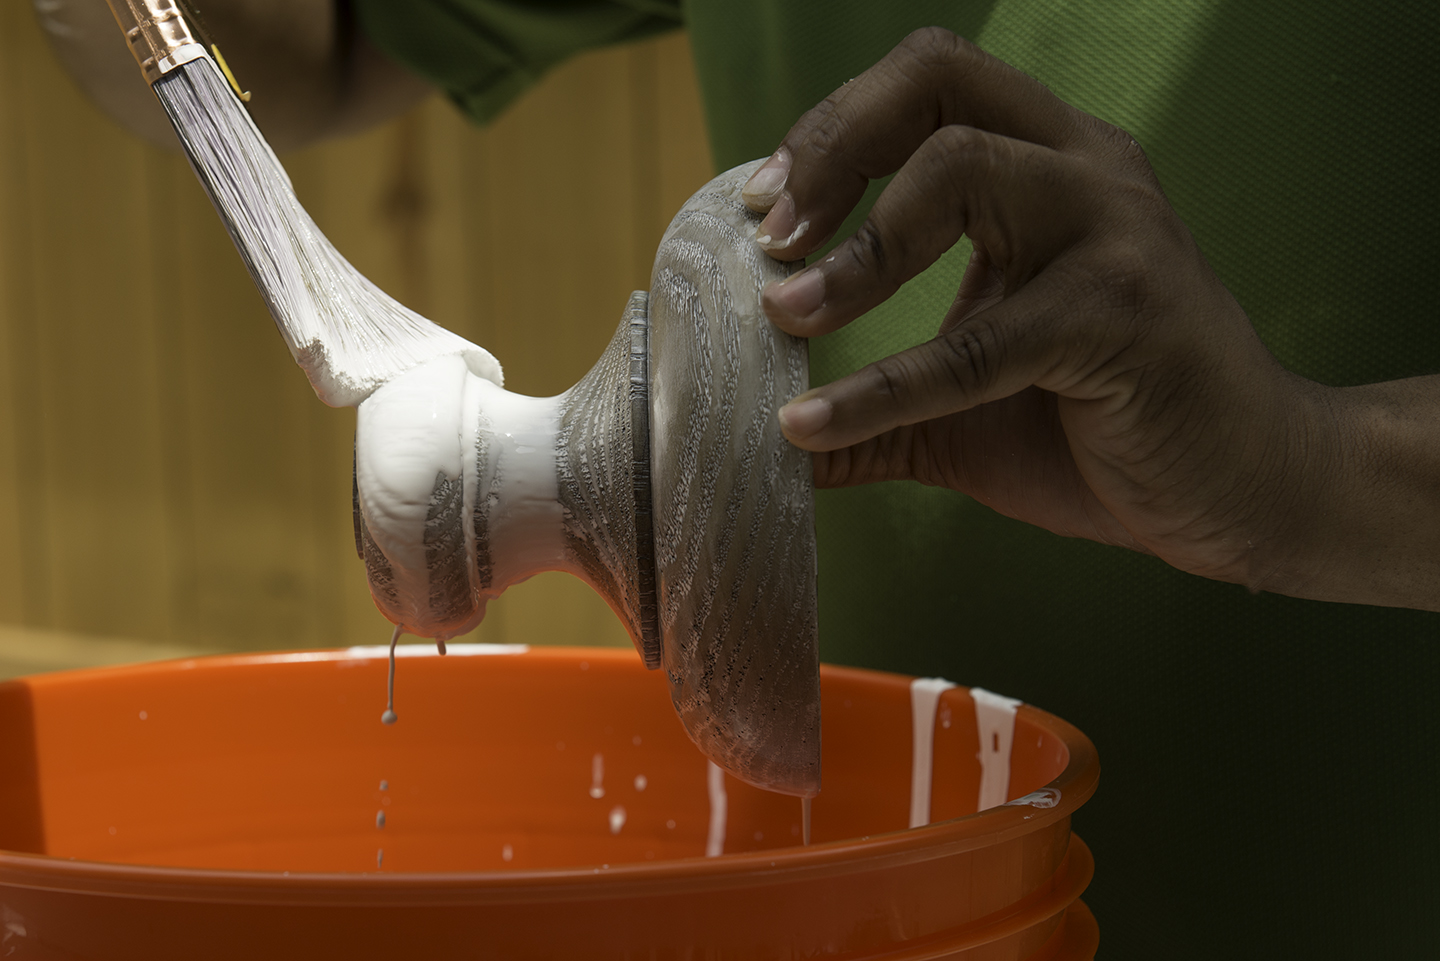 Step 6 Before the whitewash dries, use a clean rag to rub the whitewash into the grain and knots. You can also use a dry sponge. If you have any blobs of white that have already dried, remove them with sandpaper. Step 7 Add another layer of white wash if you wish, following steps four and five. We decided to go with several thick coats of whitewash for a more opaque look. Step 8 Once the chandelier is completely dry, apply water-based sealer with a brush or lint-free sponge. Apply with long, even strokes.
 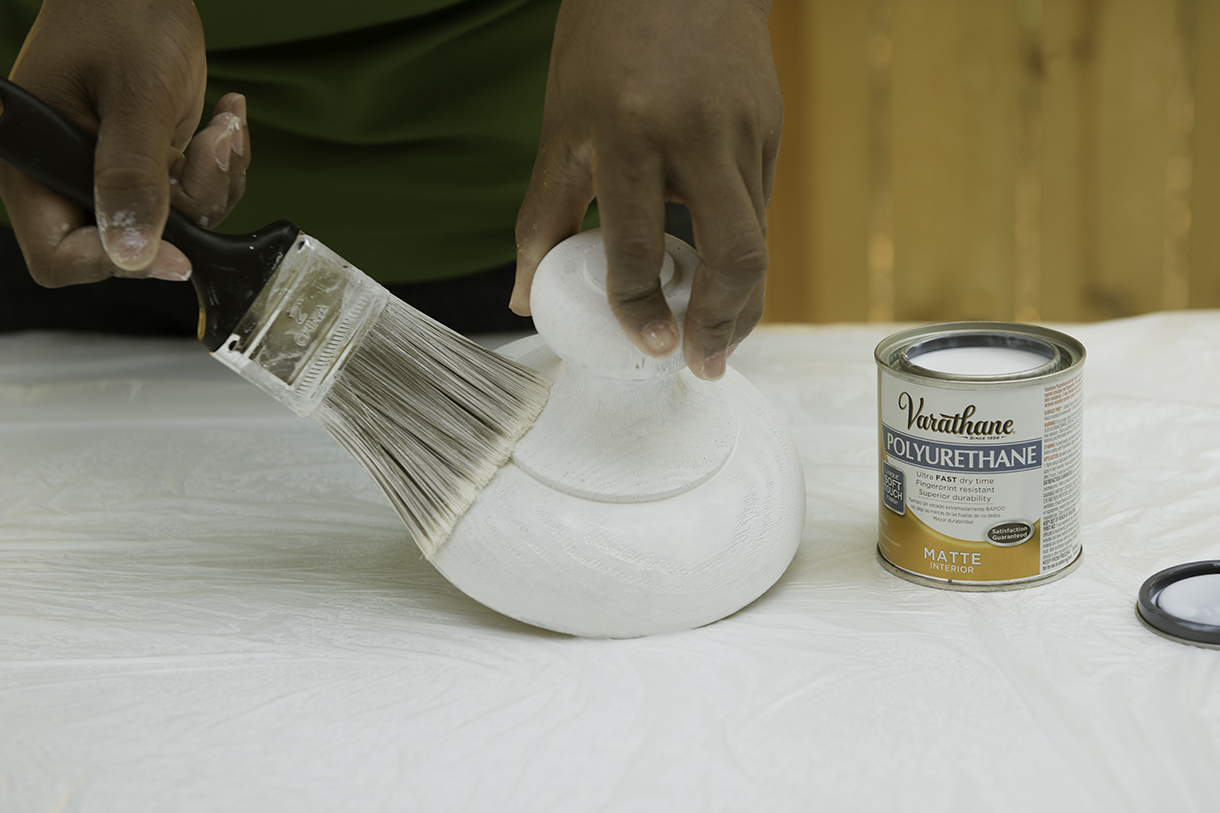 Allow to dry completely before attempting to hang.
  Home Depot’s Sarah Kellner writes on interior design and decorating. Sarah’s a big fan of DIY projects, including home lighting makeovers for chandeliers and pendants. Home Depot’s selection of chandeliers and pendants is available on the company’s website.


Join the Conversation