Spring is here, and the change of season means deep cleaning, reorganizing and updating. I love to change things up in the spring. It’s so much easier to tackle redecorating projects when your home is fresh and spotless.
One fast and painless way to update a room is to change the curtains or draperies. I recently took one pair of basic drapery panels and used them six different ways in several different rooms.
I chose sheer panels with an embroidered graphic pattern and a rod pocket. These panels are 52 inches wide x 84 inches long, and can be styled to fit almost any space.
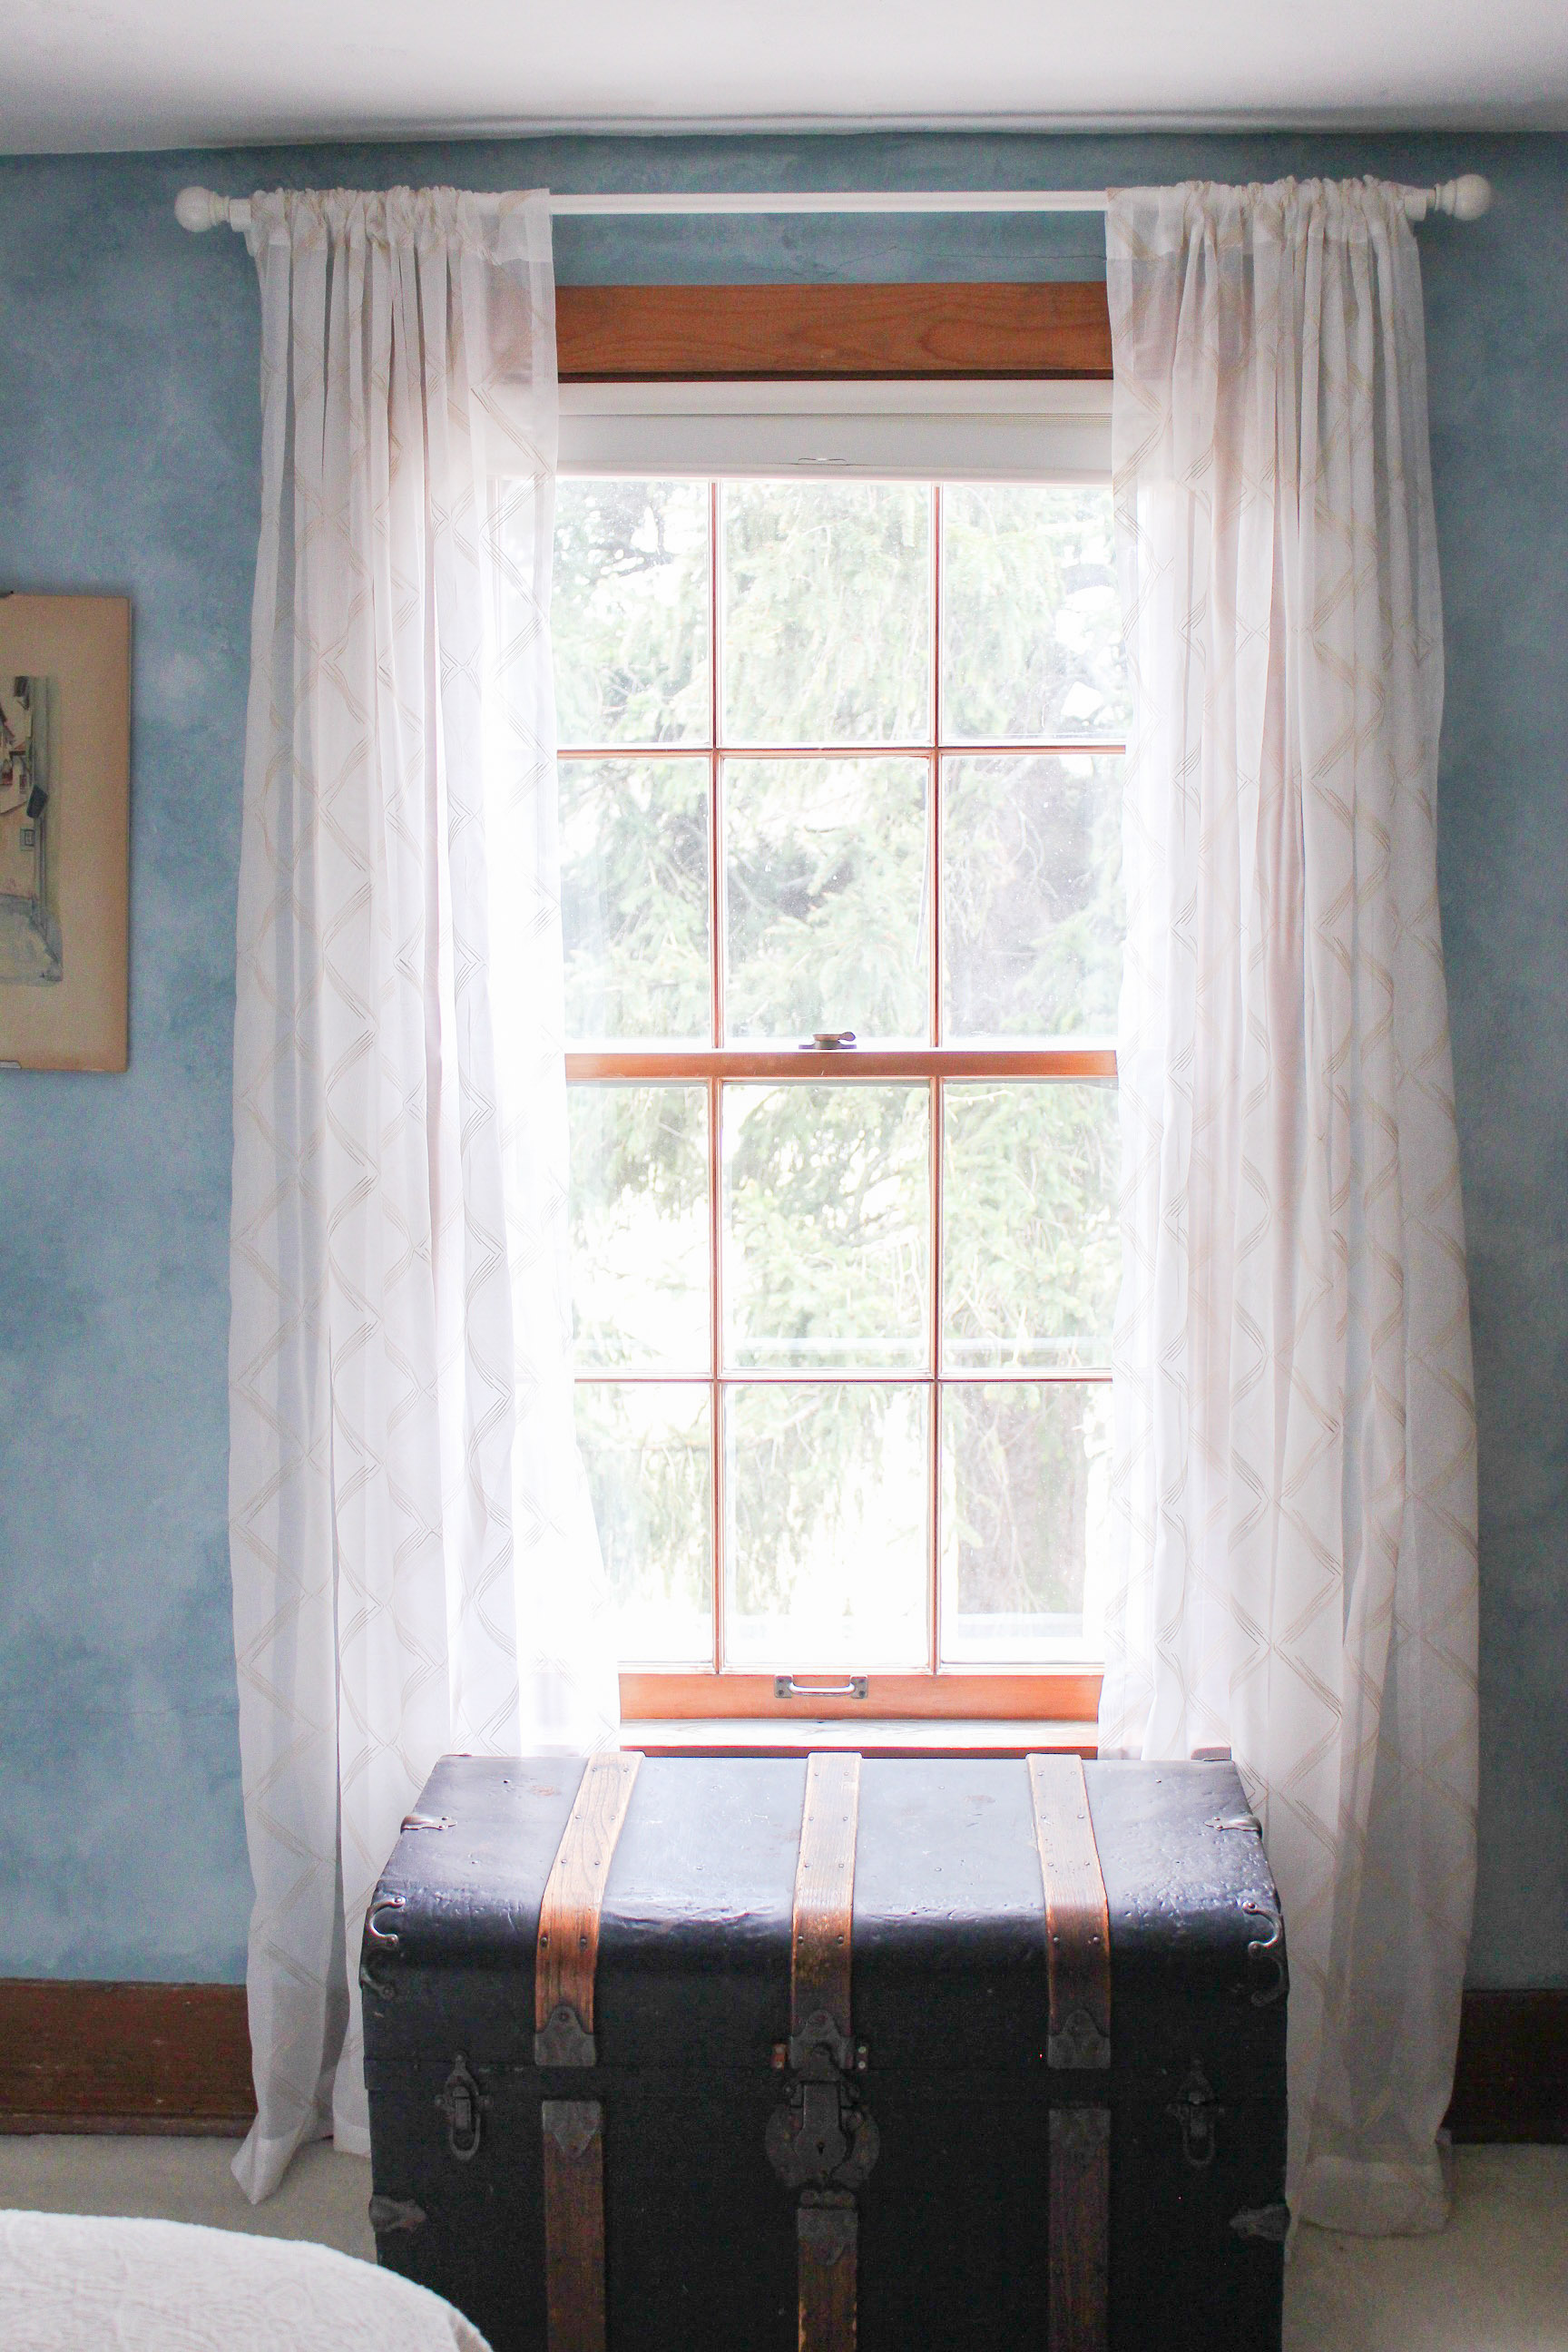
1. Stationary Panels
I started in a bedroom that had a painted wood rod with finials and hung the draperies as stationary panels.
With this style, the curtains stay in place; you don’t open or close them.
If privacy and light control are an issue, you can install blinds or a shade as well.
I recommend hanging your curtain rods as close to the ceiling as possible. That way, the ceiling appears to be higher. A little bit of “puddle” at the floor is acceptable.
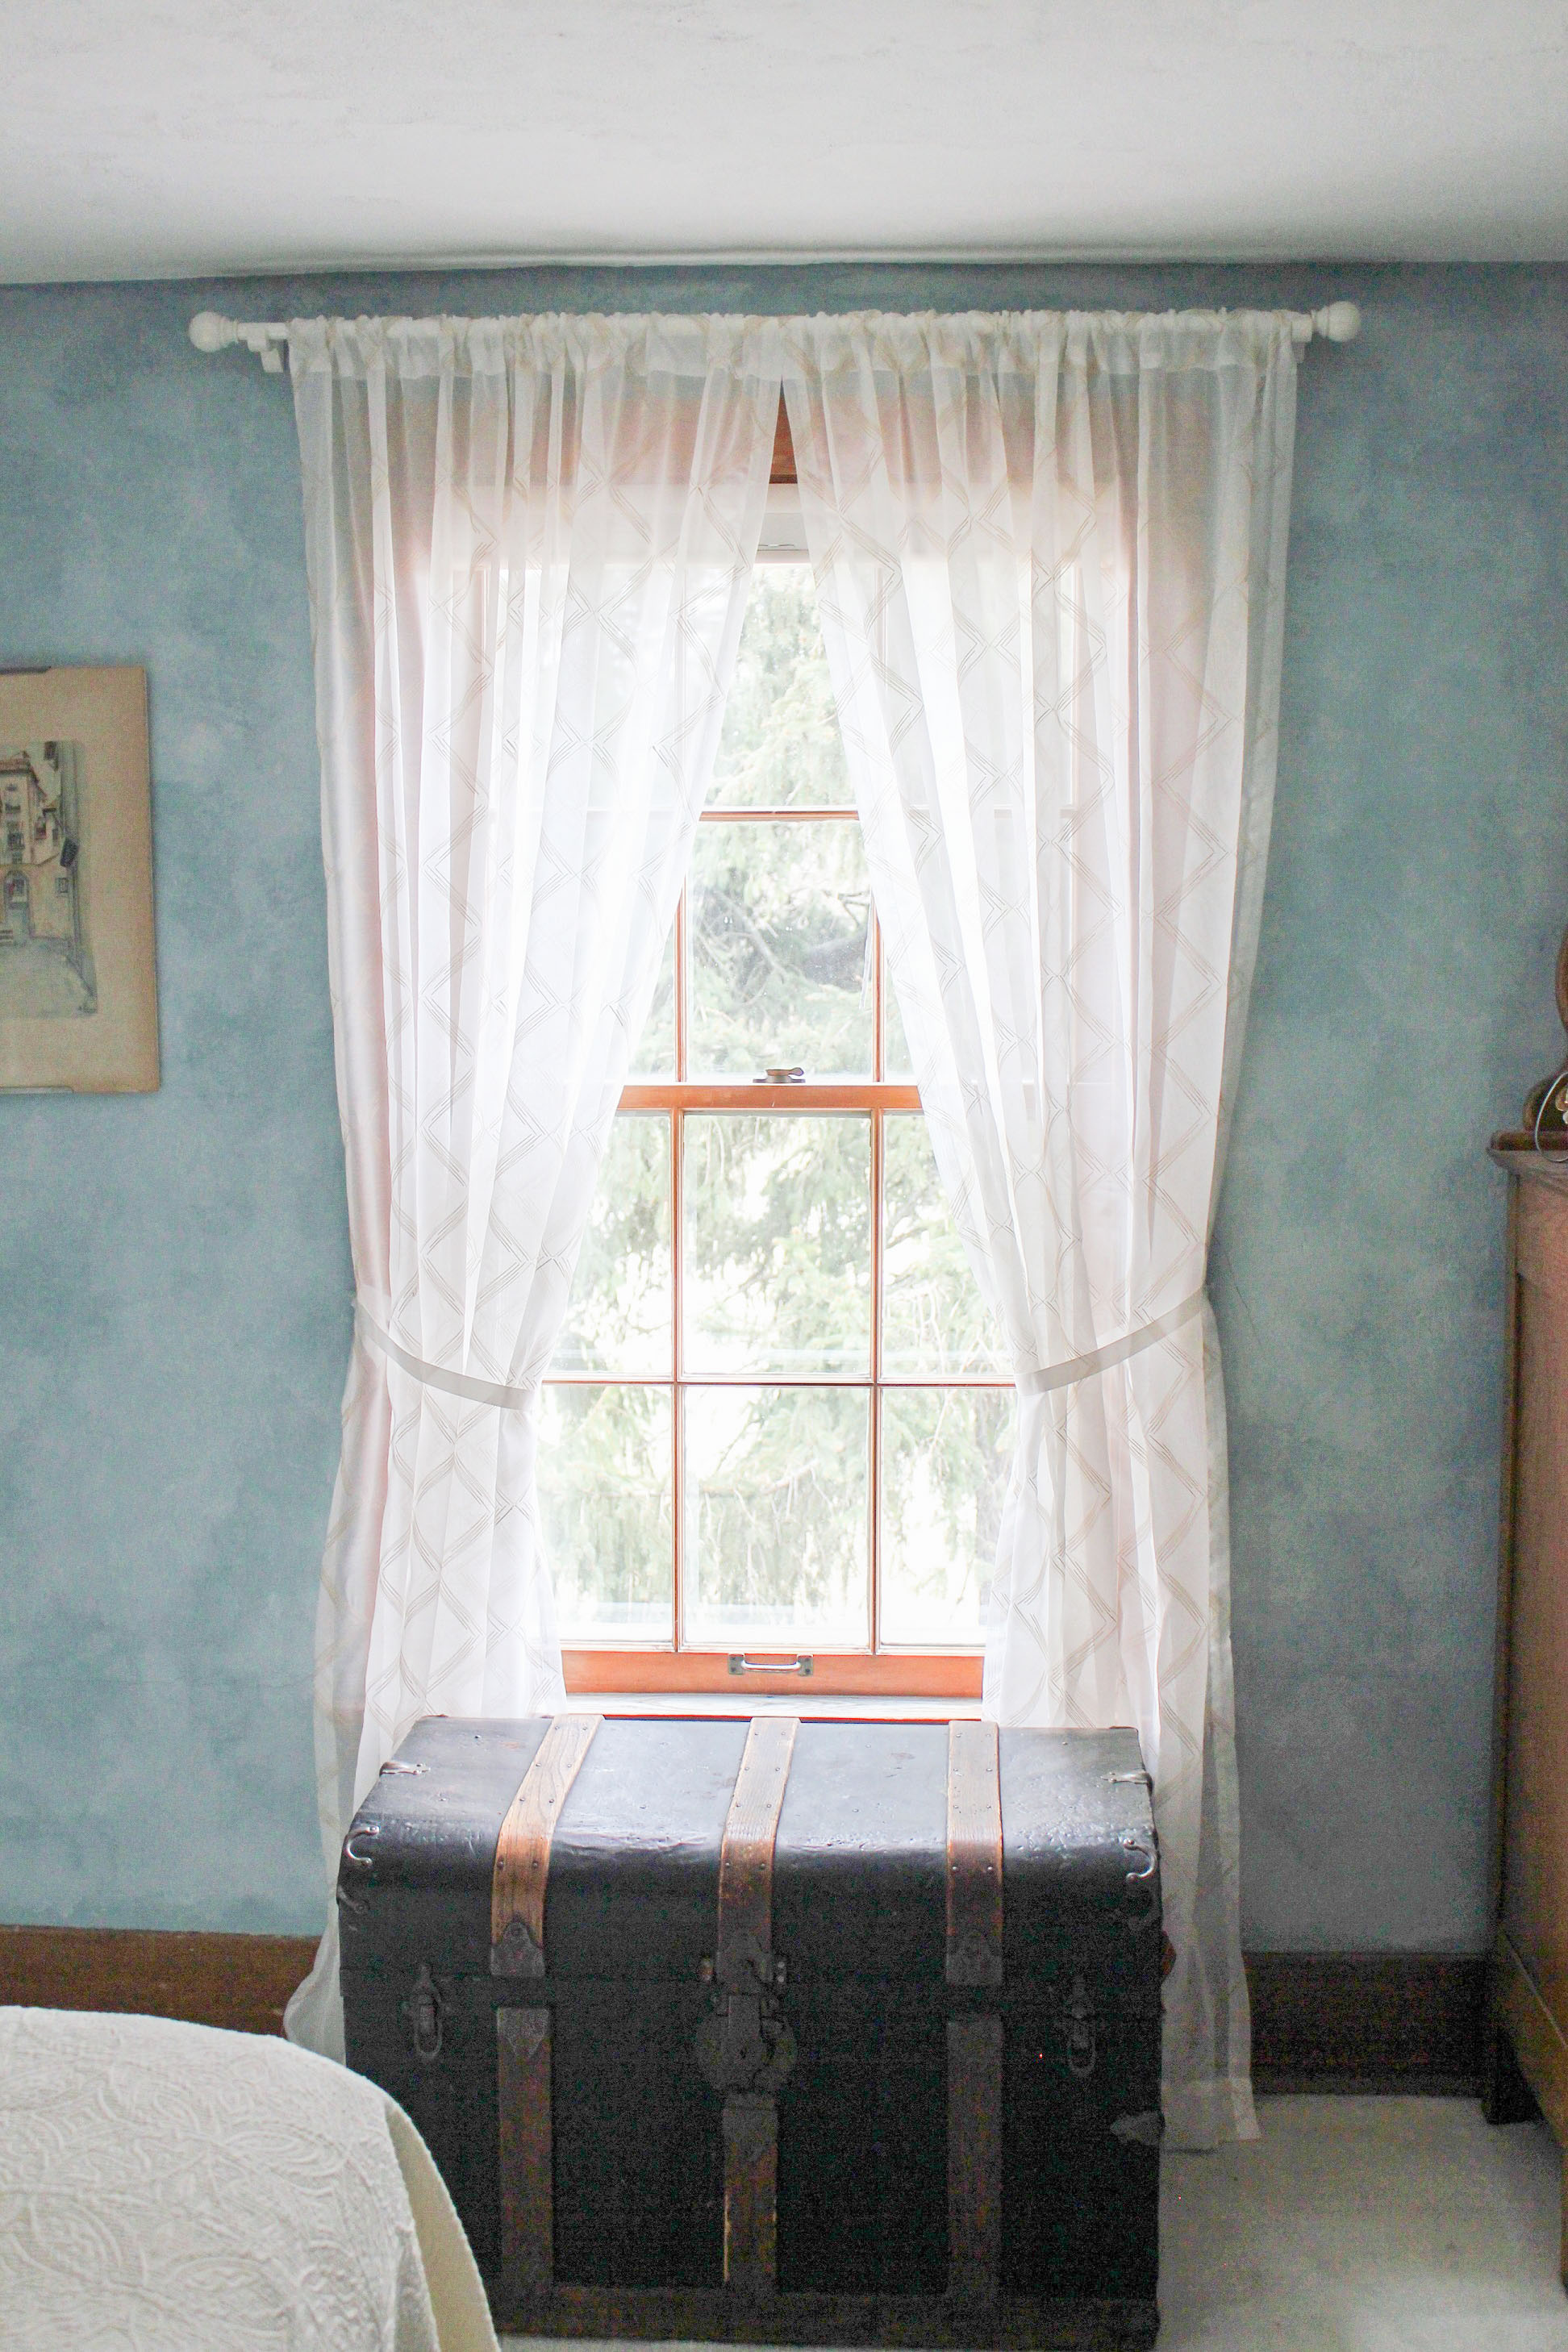
2. Meet in the Middle
If your decorating style leans toward traditional, have the panels meet in the center of the curtain rod and then pull each panel back with a ribbon or decorative cord.
You can release the tie-backs to close the curtains for privacy.
3. Tied Back
Another option for a room with two windows is to pull both panels to one side and hold in place with a tie-back. The second window should be a mirror image of the first.
For example, the left curtain panel should be drawn to the left and the right curtain panel should be drawn to the right.

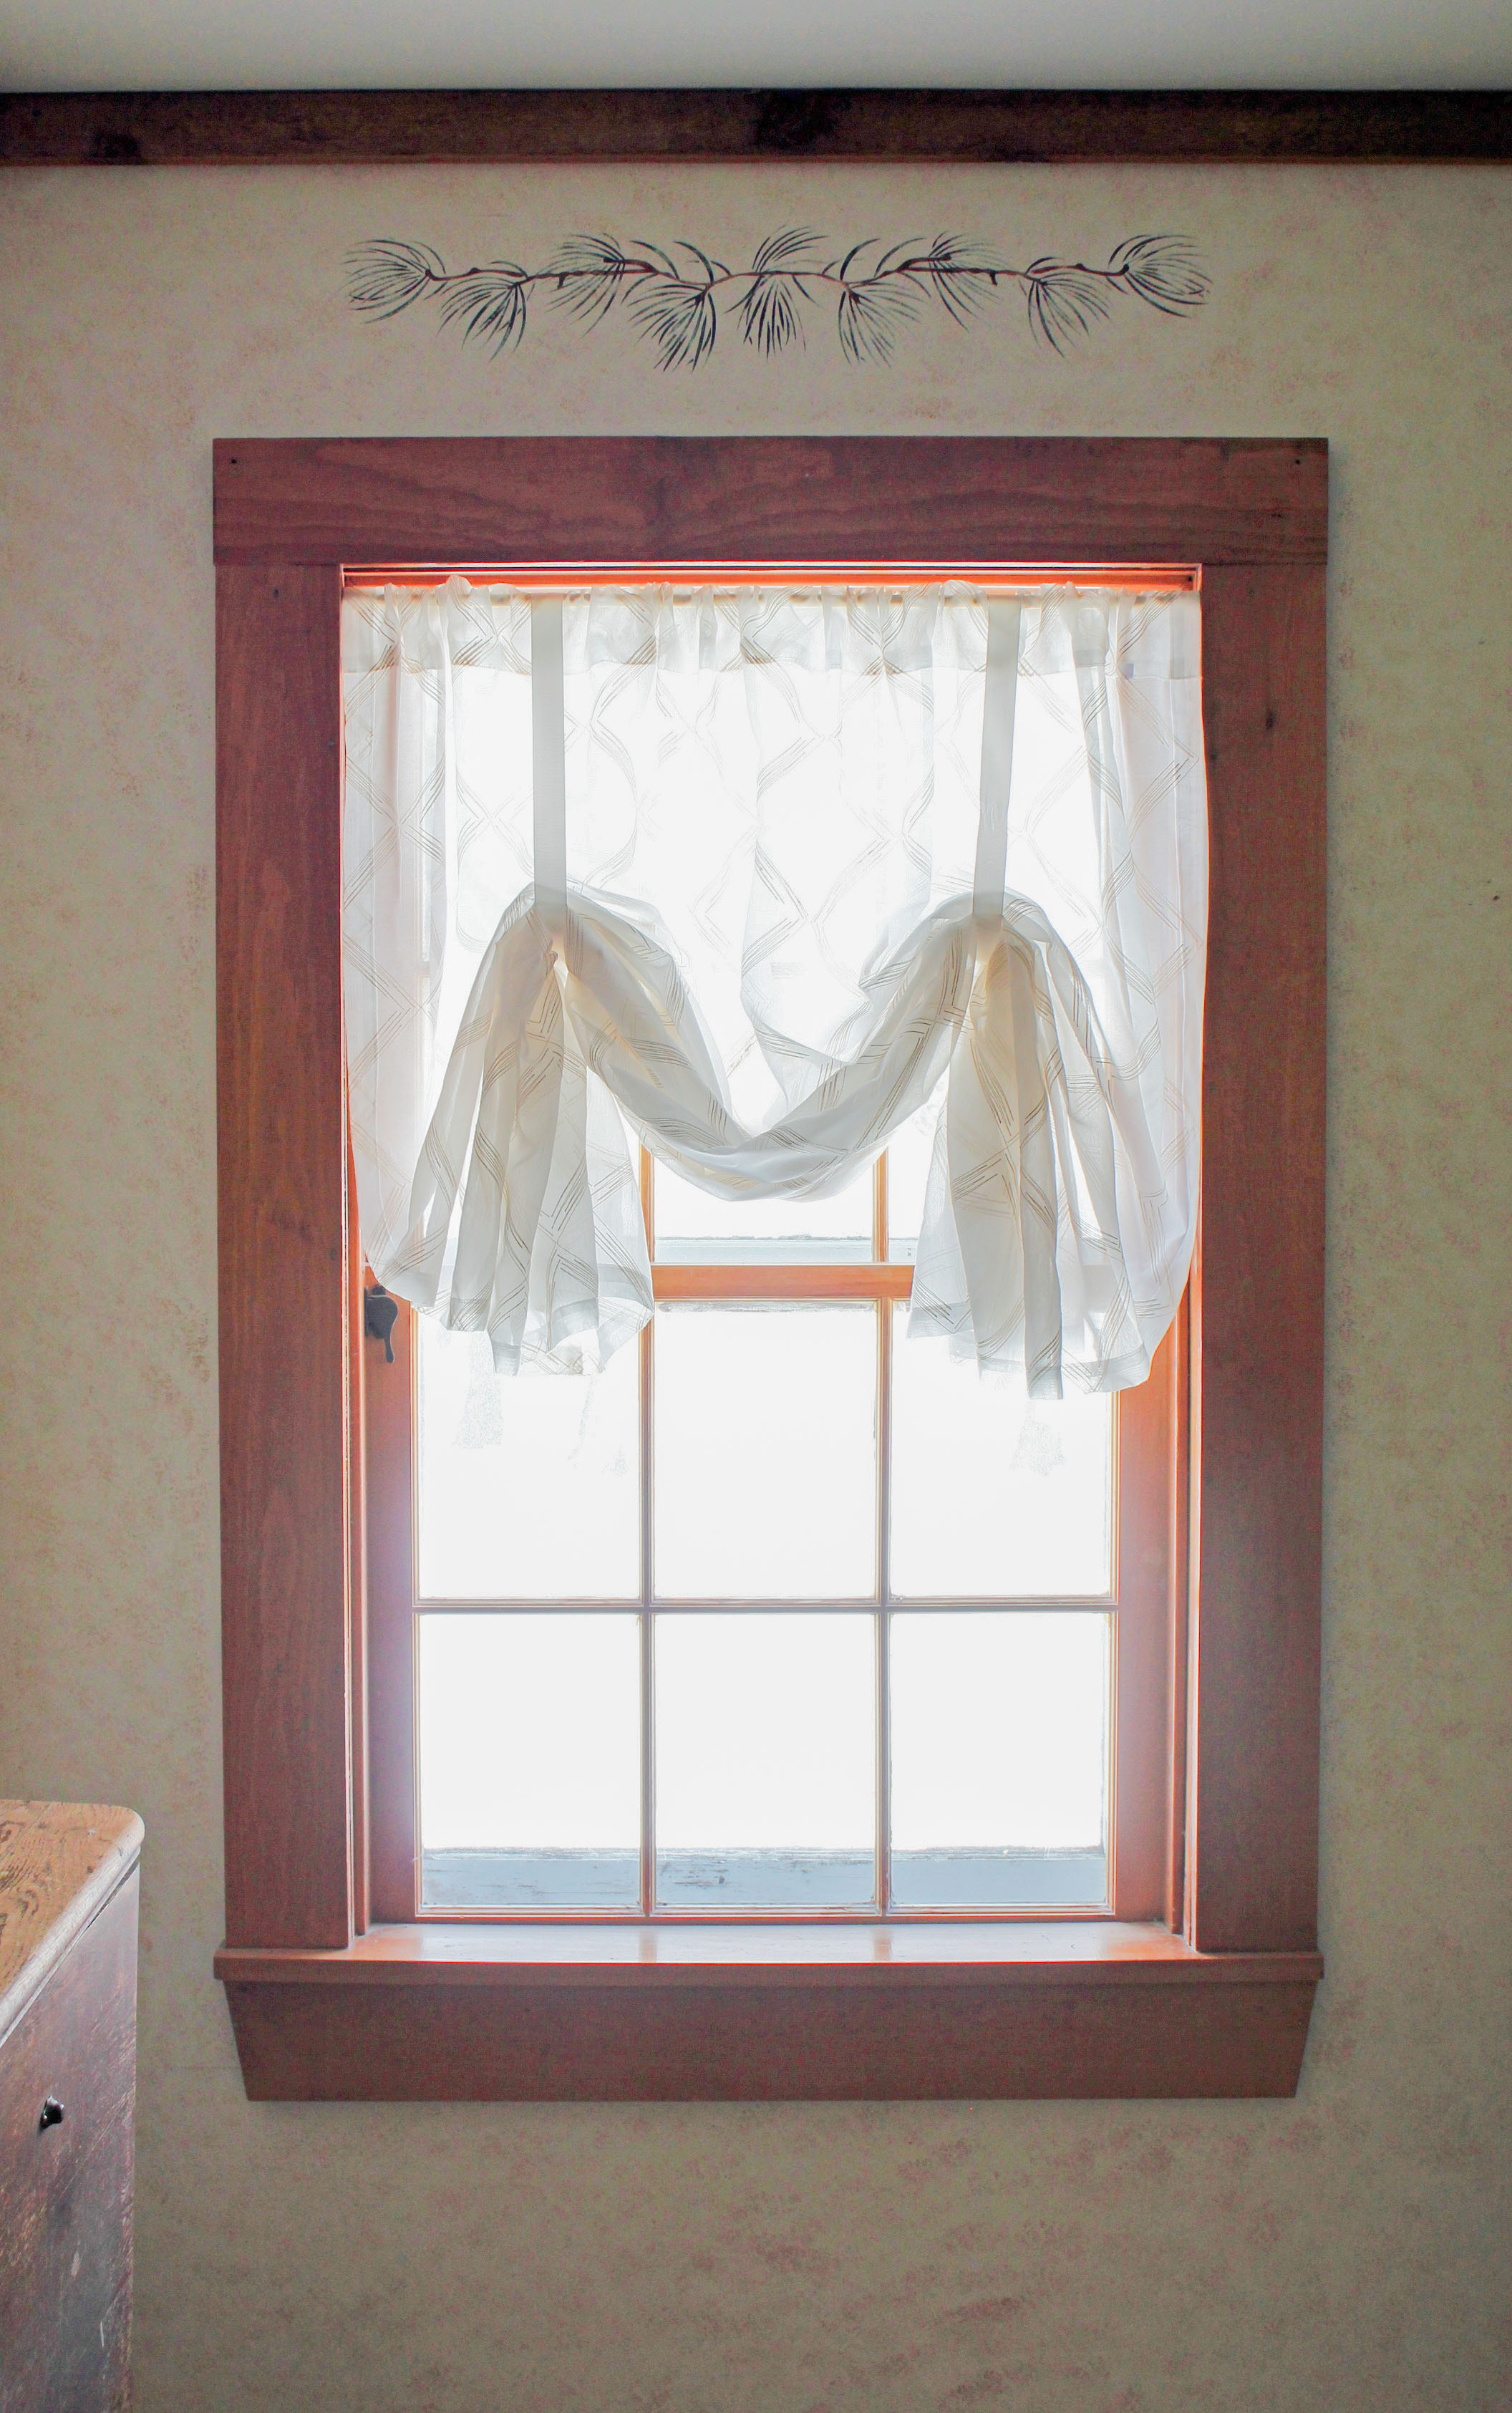
4. Faux Valance
For something totally different that works for a bathroom, powder room or nursery, I hung a single panel on a tension rod and pulled it up to create a mock balloon valance.
To get this look, gently pleat or fold the panel, starting at the hem, then hold the folds in place with a ribbon.
Wrap a ribbon around the pole and tie the two ends together. Arrange the curtain until you get a gentle curve in the middle.
The length of the valance can be as long or short as you want. Cut the ribbon accordingly. I chose to match the ribbon to the fabric, but a contrasting color could give the window a totally different look.
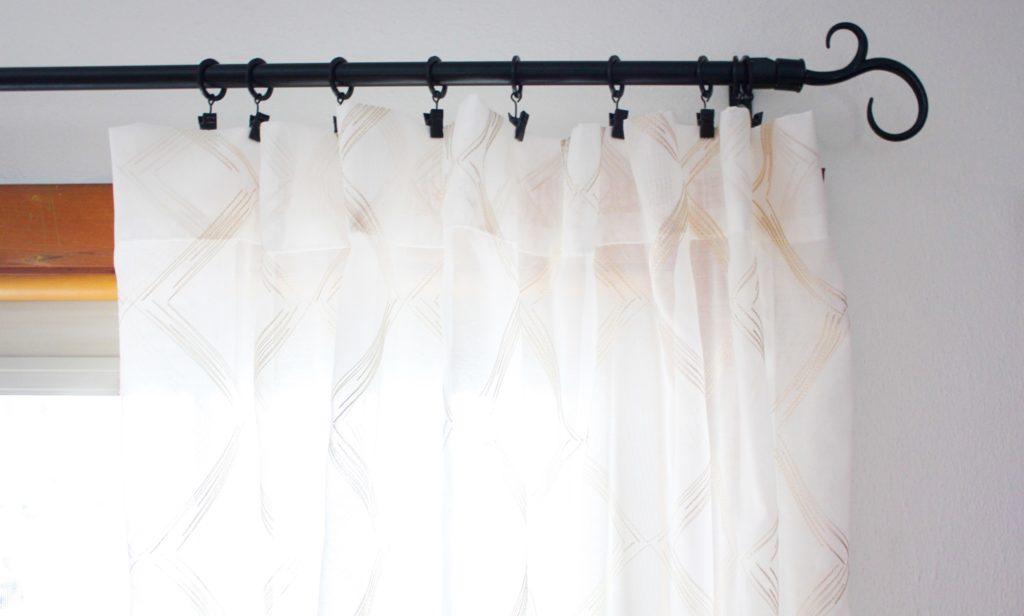
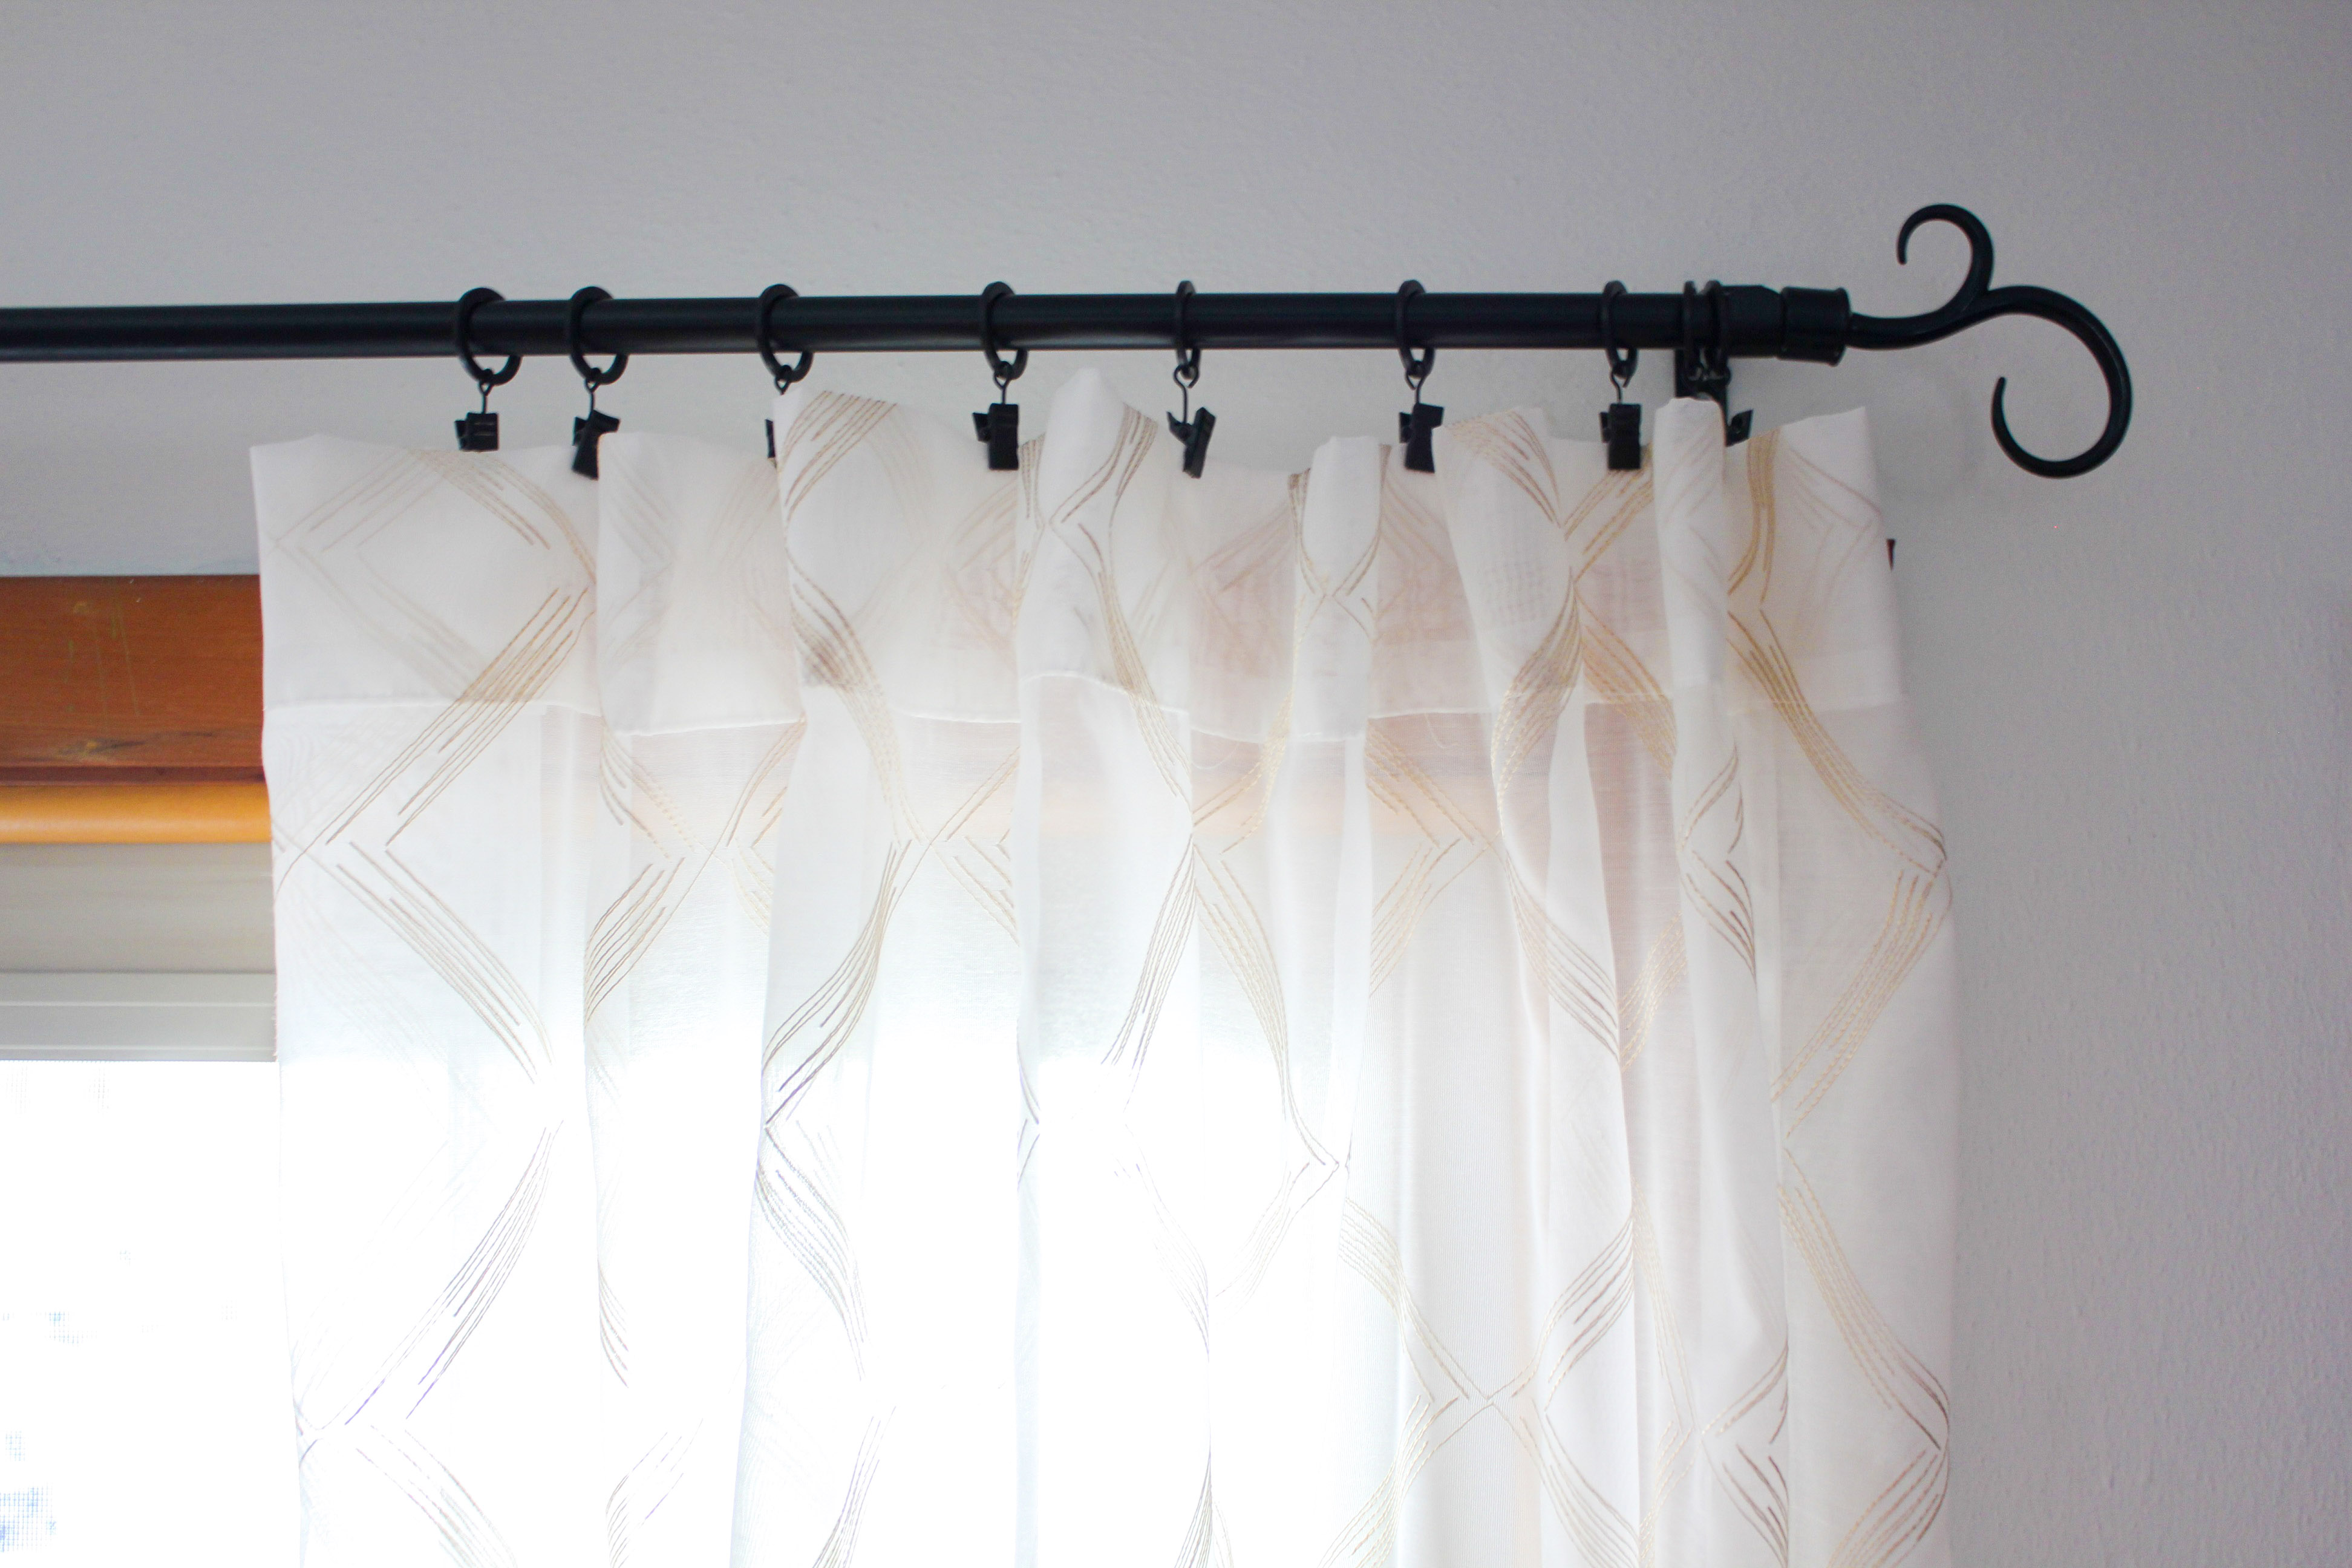
5. Add Clip Rings
A rod pocket curtain is very versatile. While it can be hung on its own, I added curtain clip rings here for a more relaxed look.
This casual style is perfect in a living room, dining room and bedroom. The rings simply clip onto the top of the drapery and slide smoothly on the rod for easy opening and closing.
If the curtain rod is too high, use a drapery baton or wand. A baton keeps you from pulling on the panels, so it protects them from wear and tear.
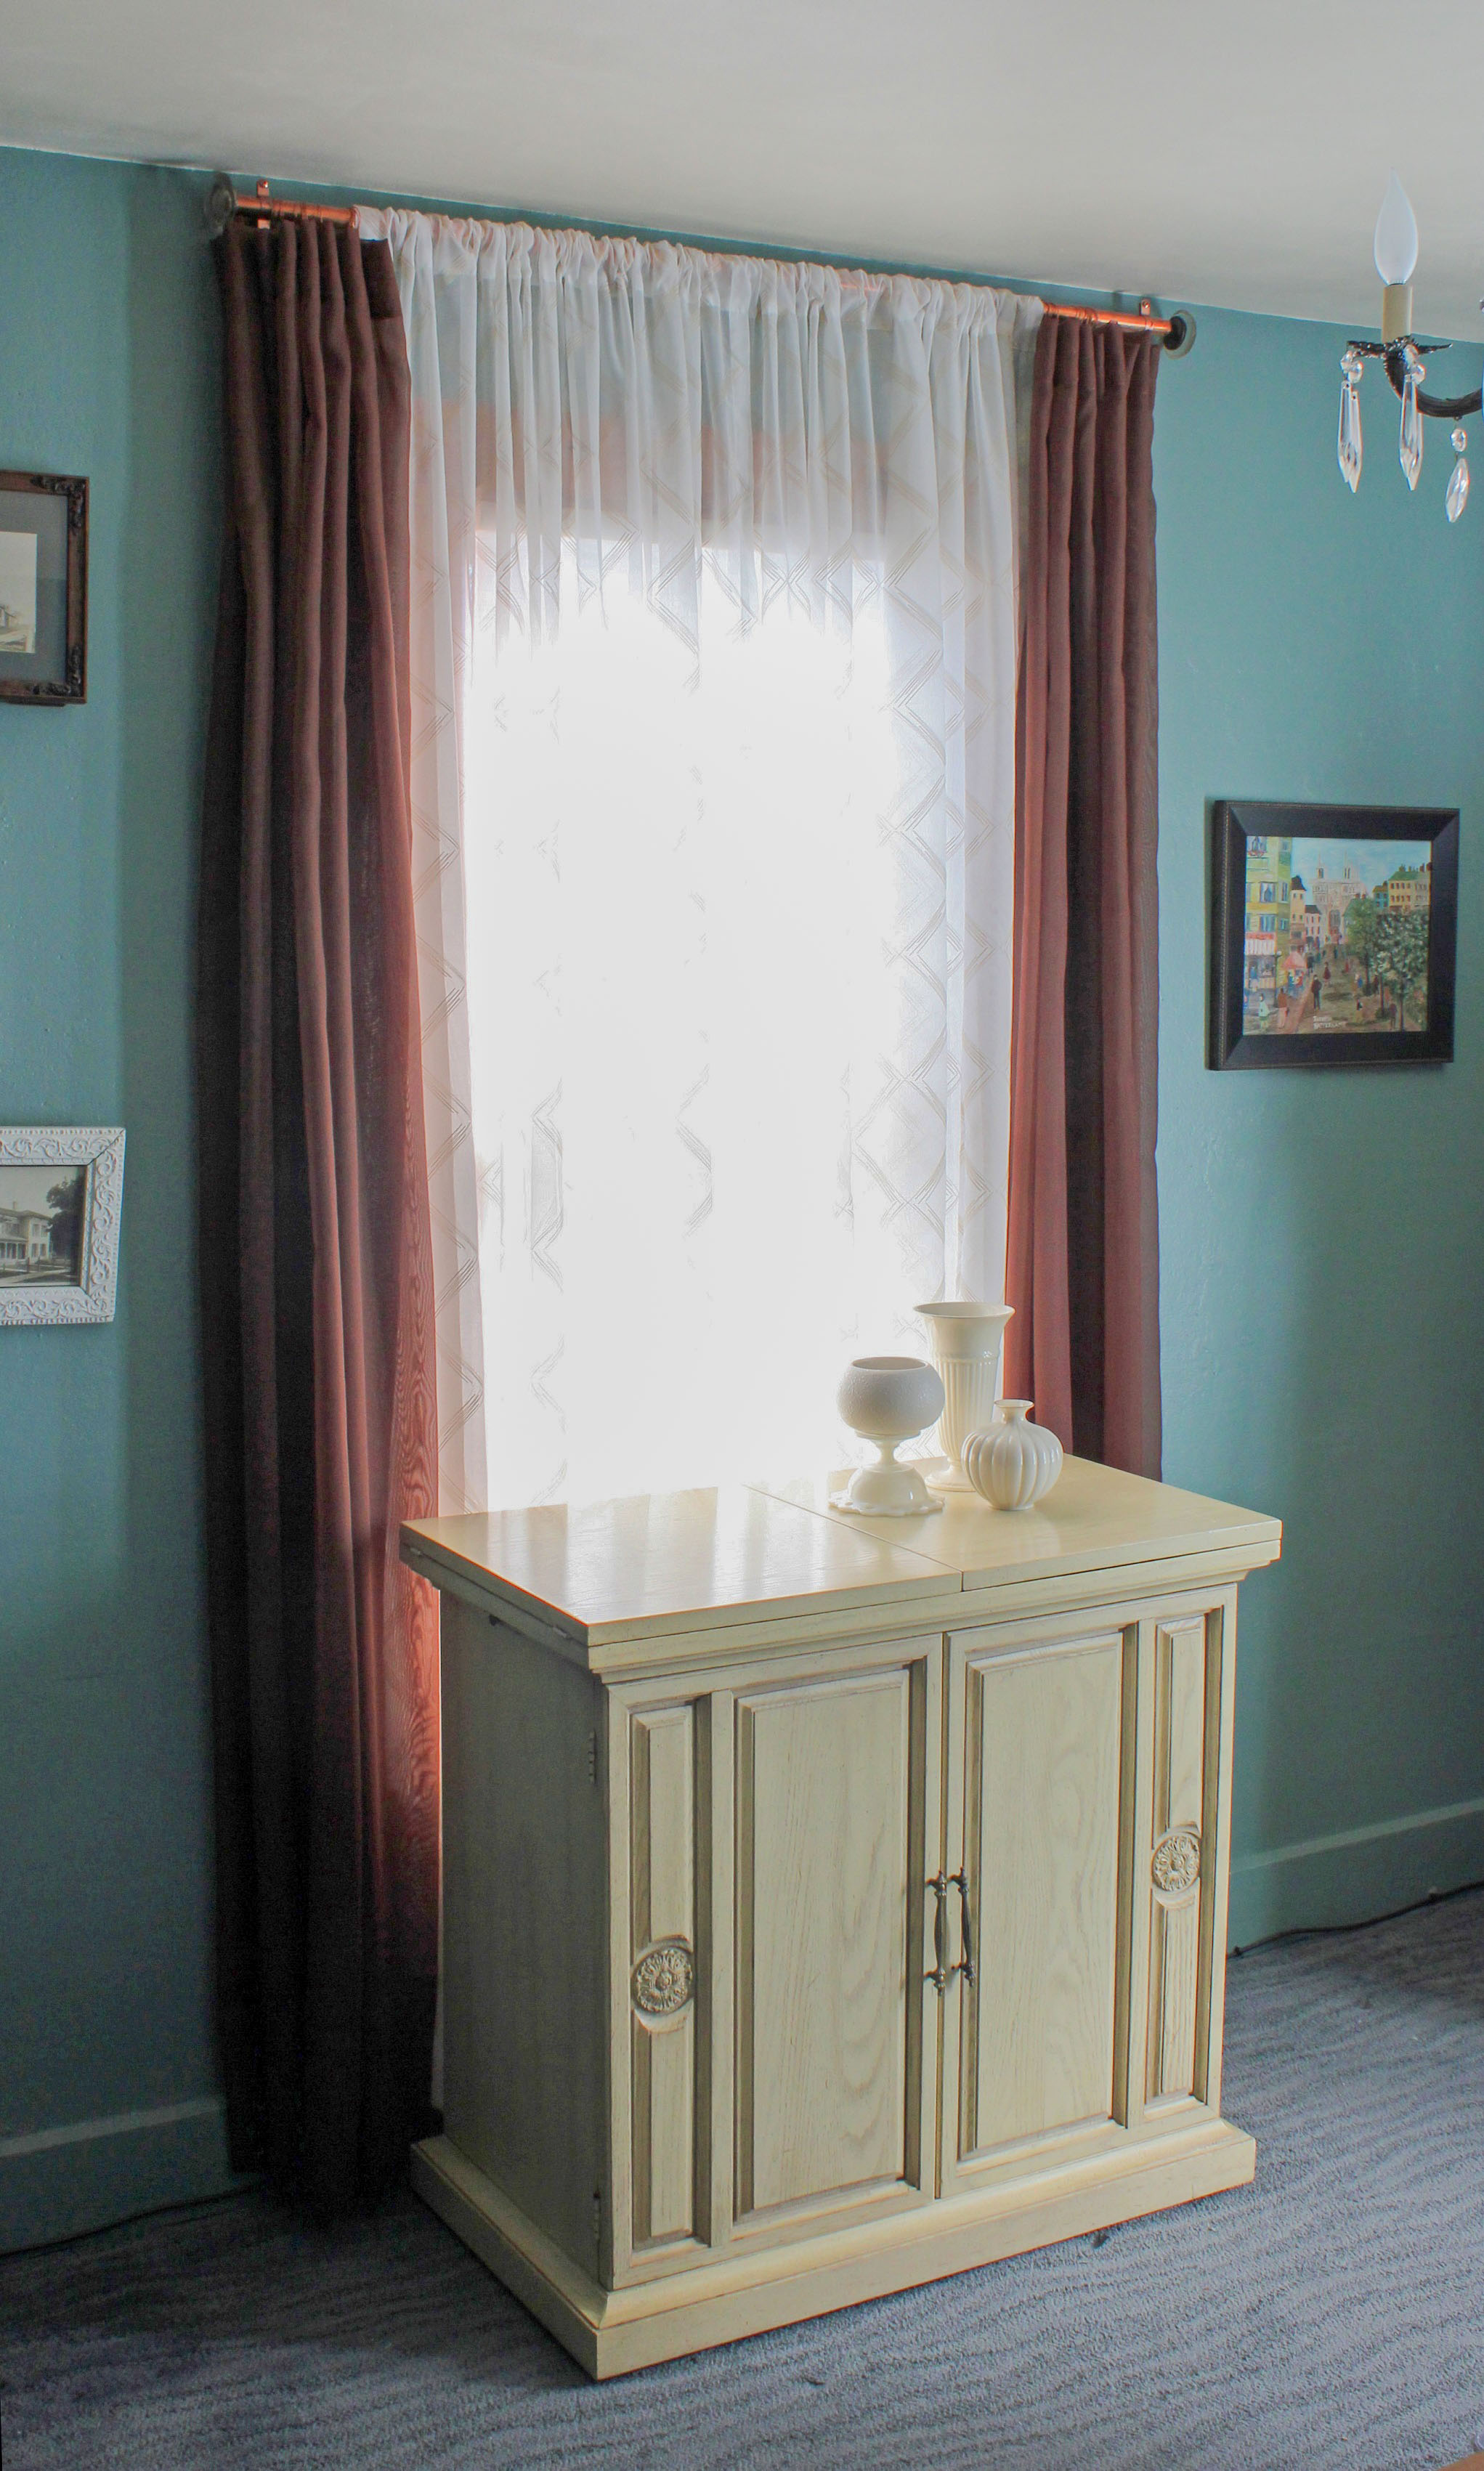
6. Add a Contrasting Color
Finally, I paired the off-white panels with darker drapes. Using more than one color and texture adds contrast and interest.
Layered curtains work well in a dining room or living room when you want to control the light for added atmosphere.
The best part of this DIY decorating project is that it requires no sewing, so anyone can design their own customized curtain style. When you are tired of the old look, rearrange your curtains into something entirely new.
Merri Cvetan is an interior designer in Wisconsin and an expert on home decor, including window treatments, drapes and curtains. Merri writes tips on interior design for The Home Depot. To research a wide selection of draperies and curtains, you can visit Home Depot’s website.


Join the Conversation